
Create and Manage New Personal Virtual Cards on Priyo
Video Tutorial:
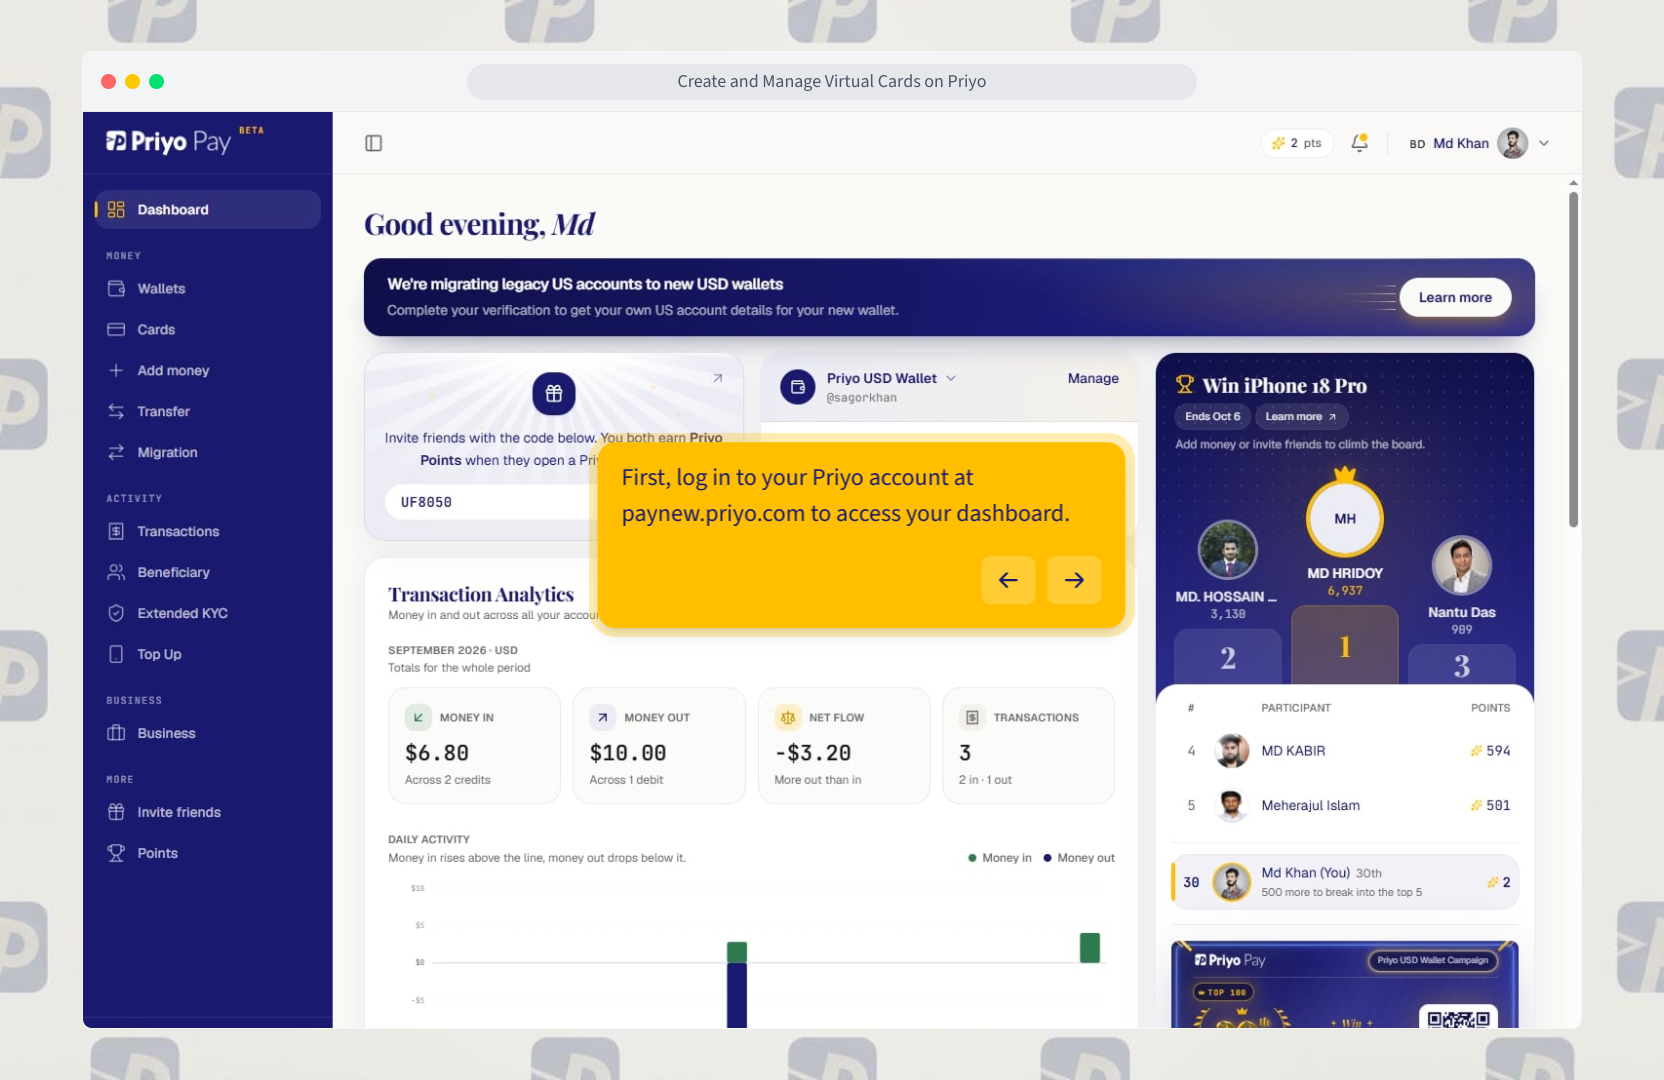
Step 1: Log in to your Priyo account
First, log in to your Priyo account at pay.priyo.com to access your dashboard.
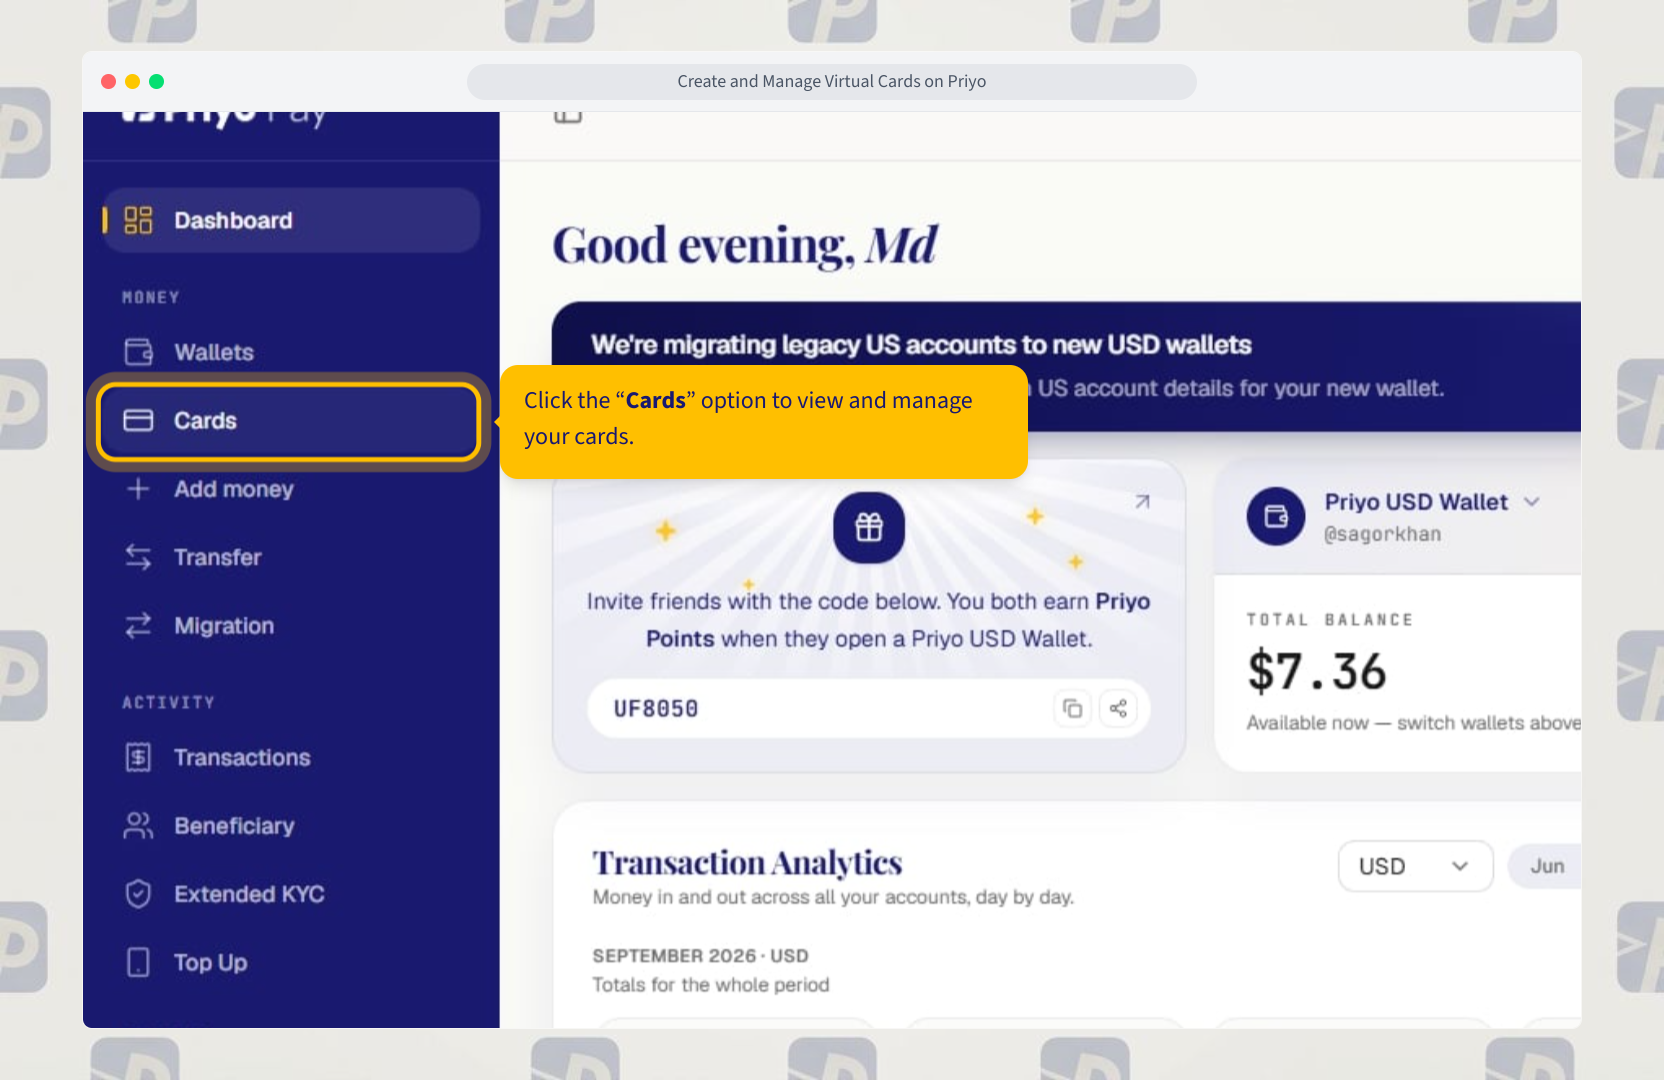
Step 2: Open Cards
Click the Cards option to view and manage your cards.
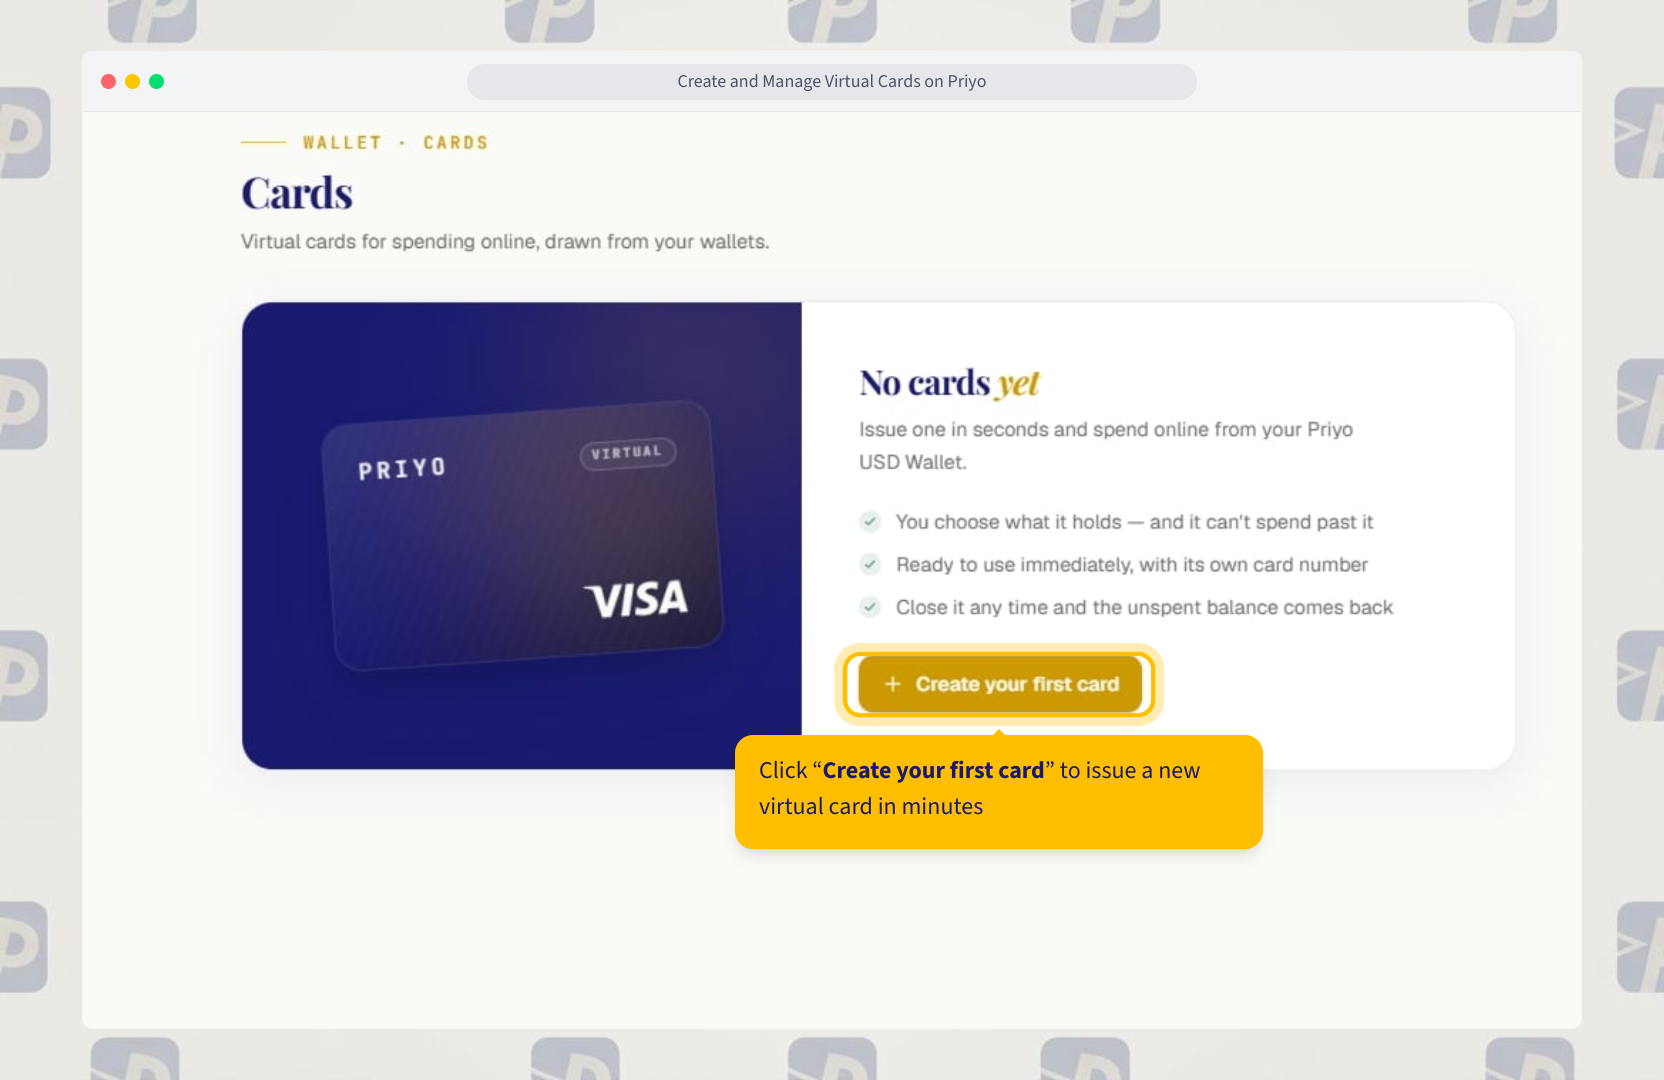
Step 3: Create your first card
Click Create your first card to issue a new virtual card in minutes.
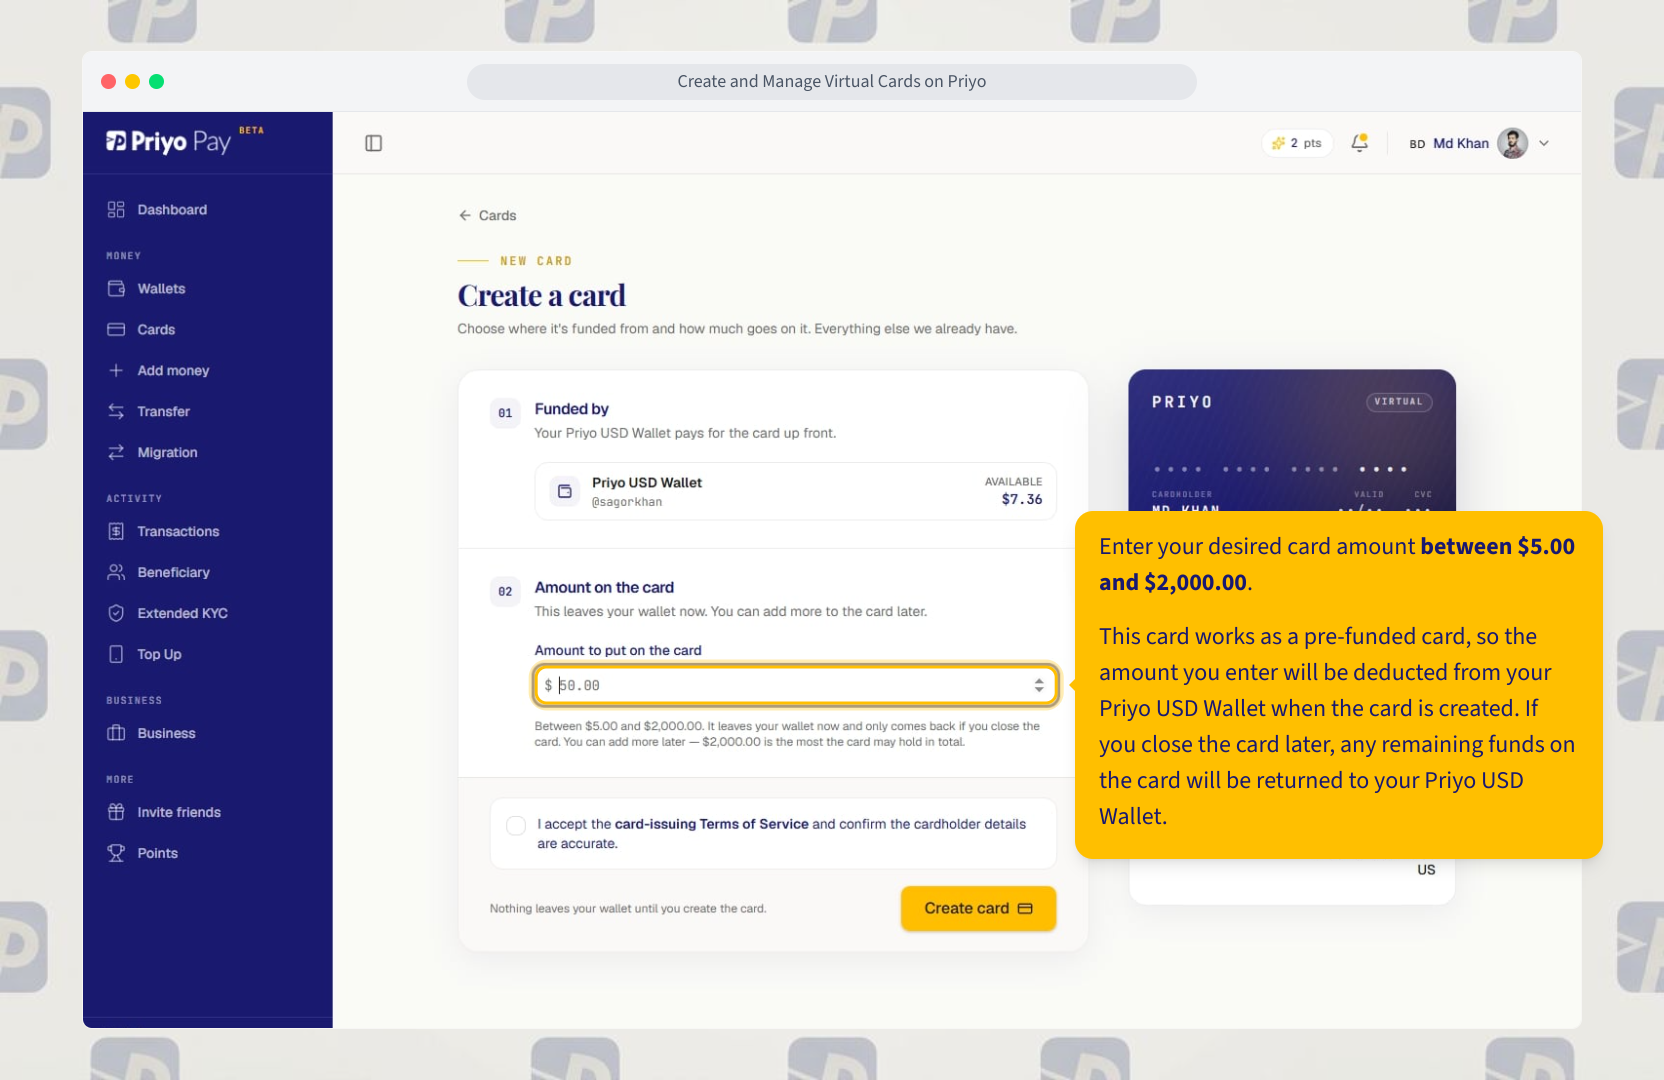
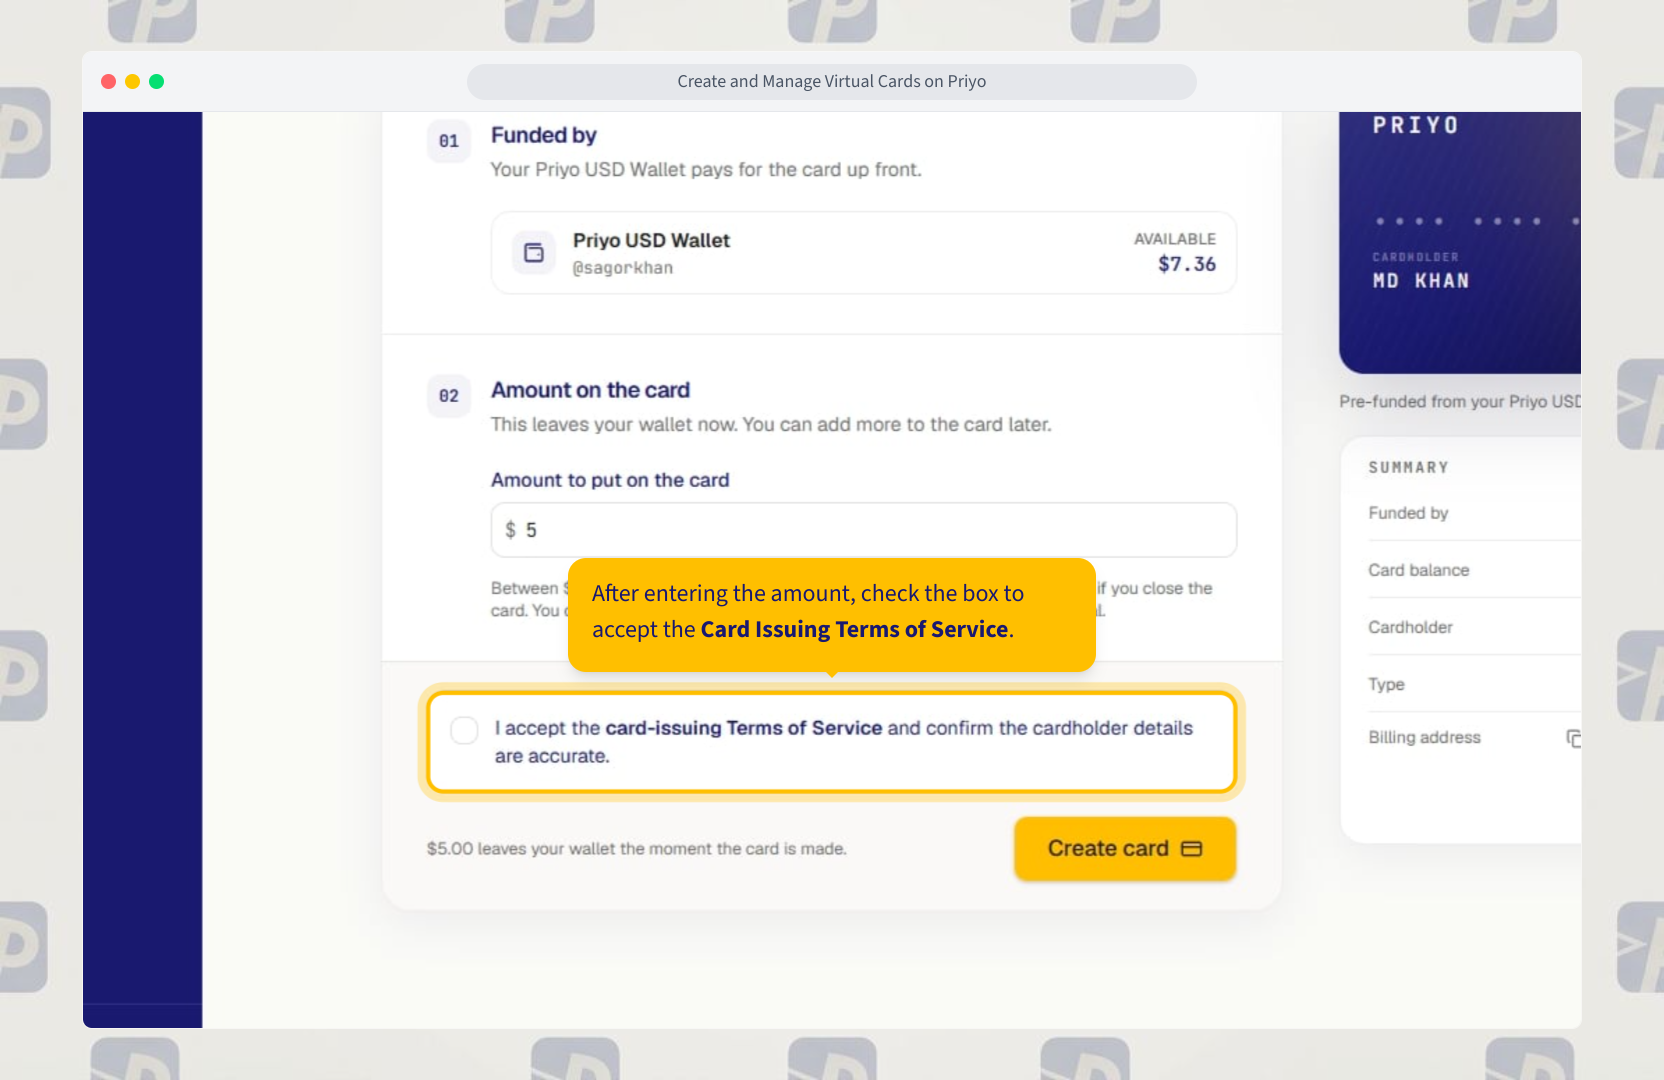
Step 4: Enter your card amount
Enter your desired card amount between $5.00 and $2,000.00.
This card works as a pre-funded card, so the amount you enter will be deducted from your Priyo USD Wallet when the card is created.
If you close the card later, any remaining funds on the card will be returned to your Priyo USD Wallet.
Step 5: Accept the Card Issuing Terms
After entering the amount, check the box to accept the Card Issuing Terms of Service.
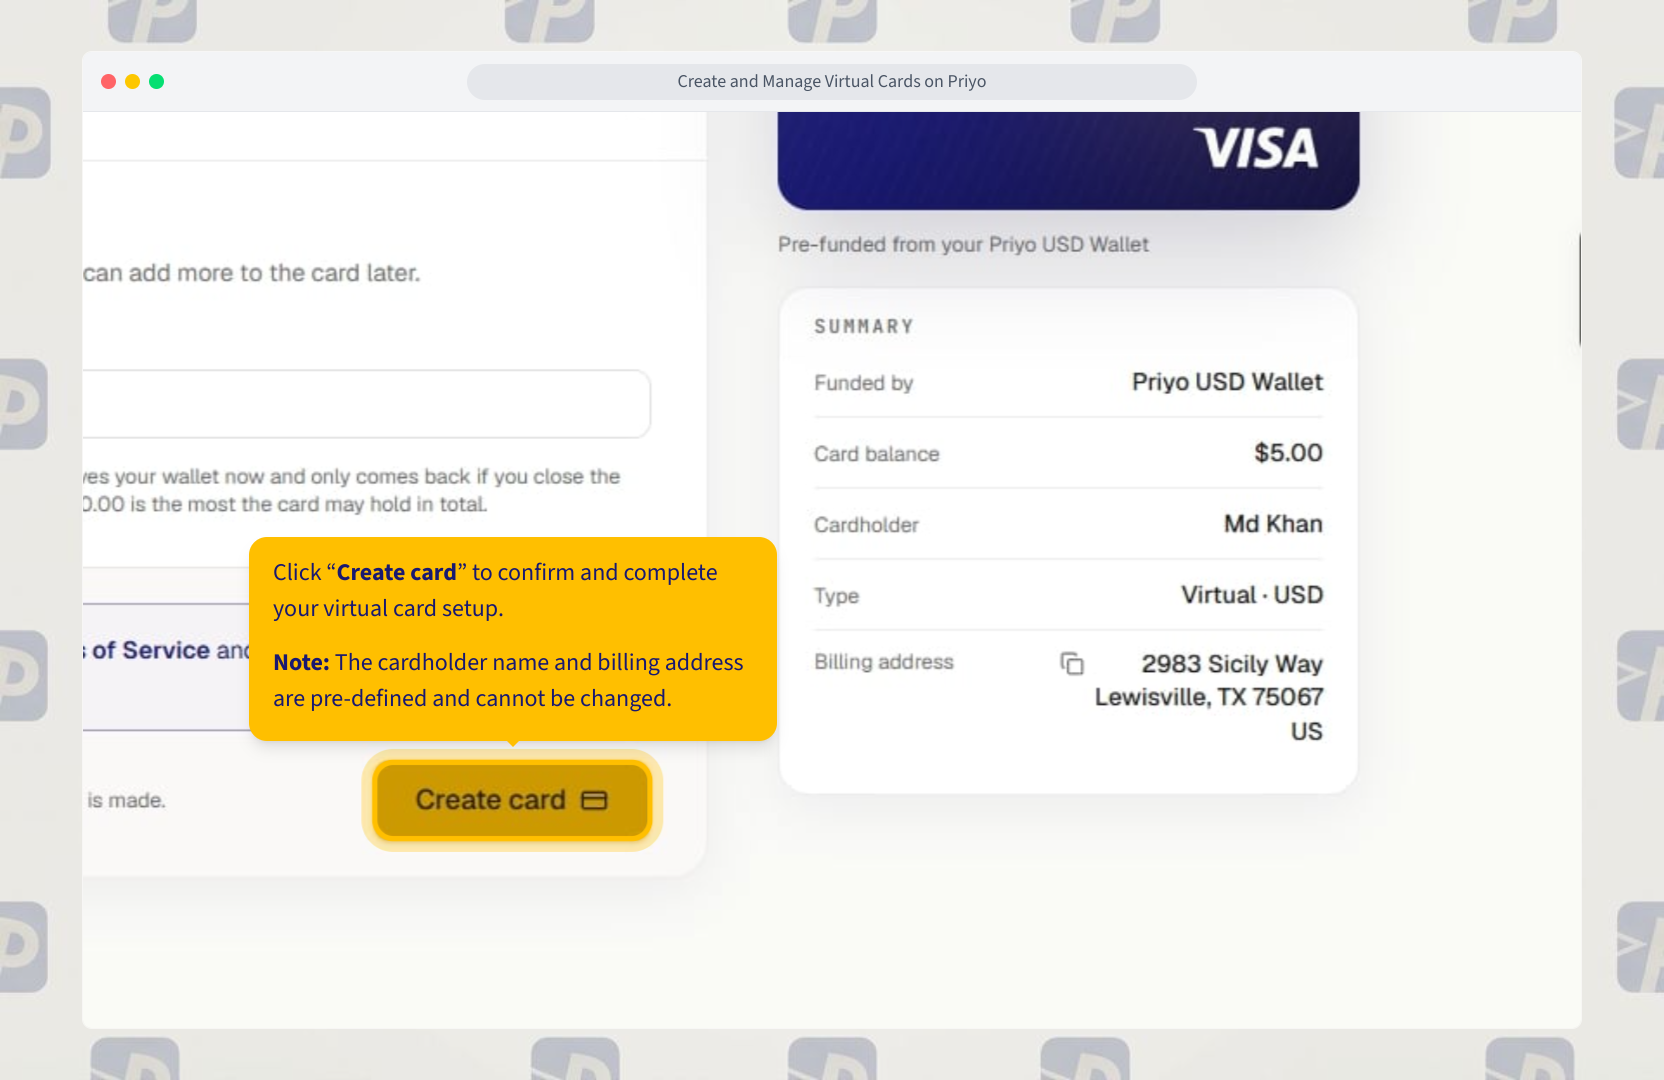
Step 6: Create your card
Click Create card to confirm and complete your virtual card setup.
Note: The cardholder name and billing address are pre-defined and cannot be changed.
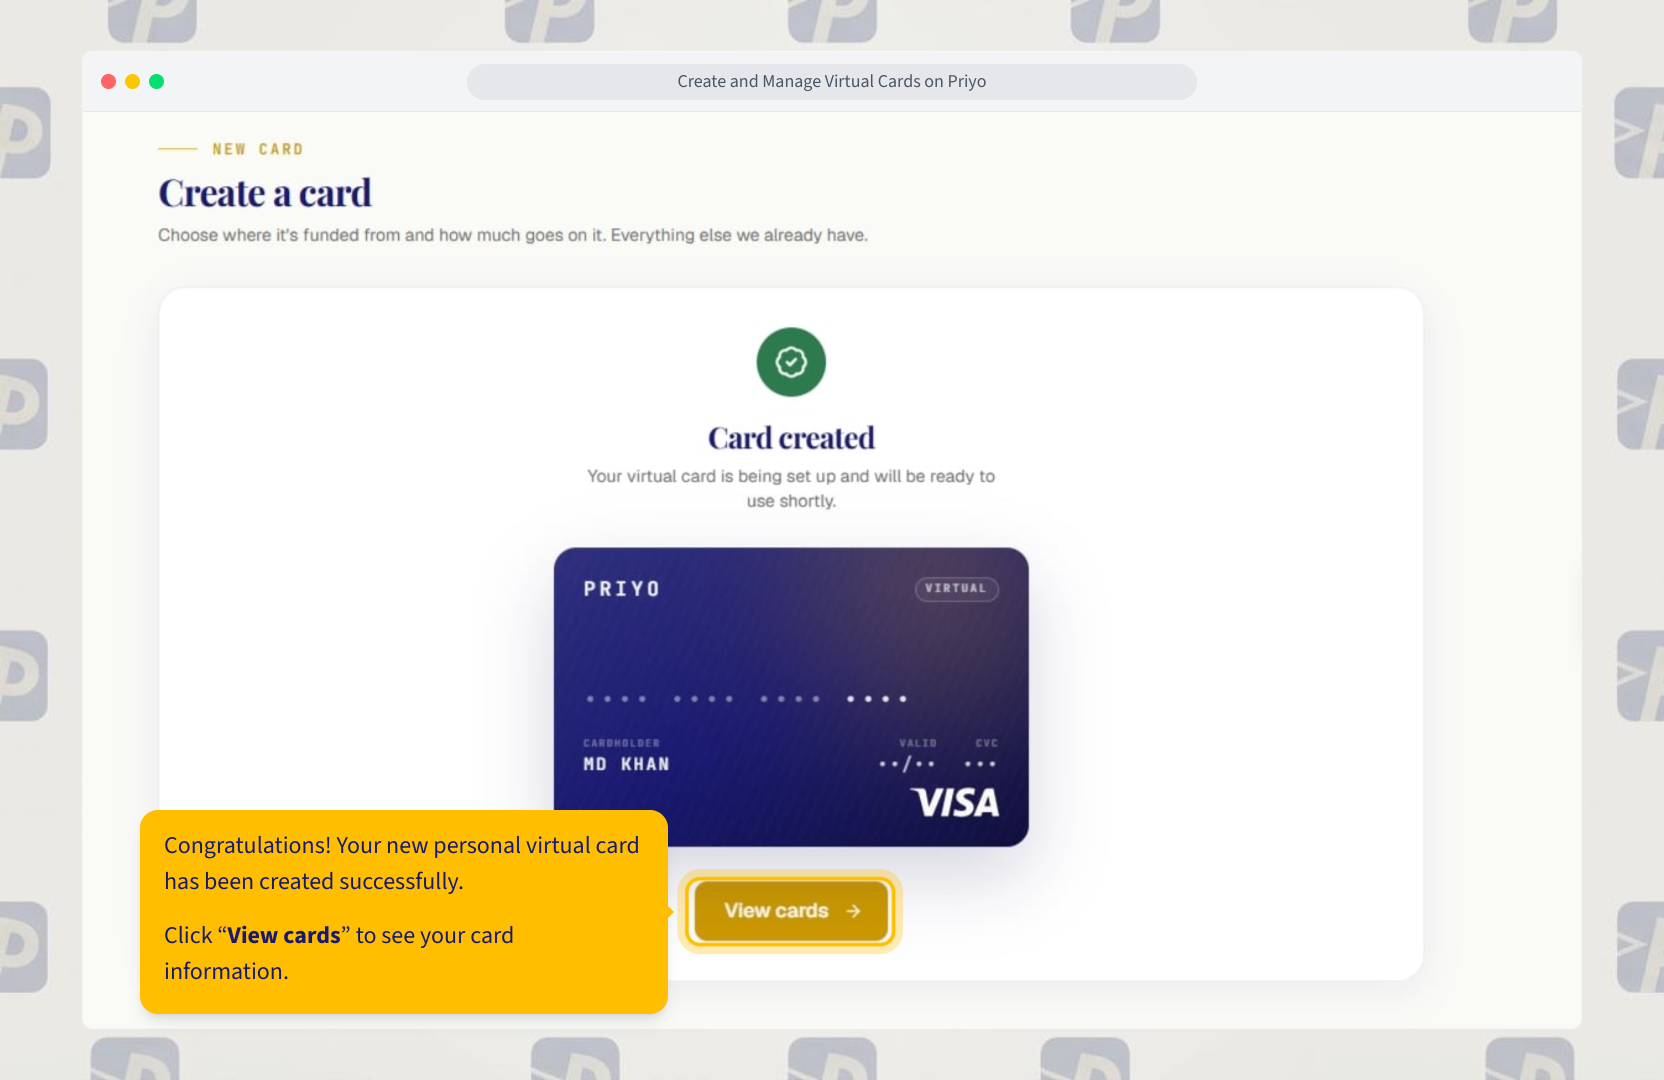
Step 7: Your virtual card is created
Congratulations! Your new personal virtual card has been created successfully.
Click View cards to see your card information.
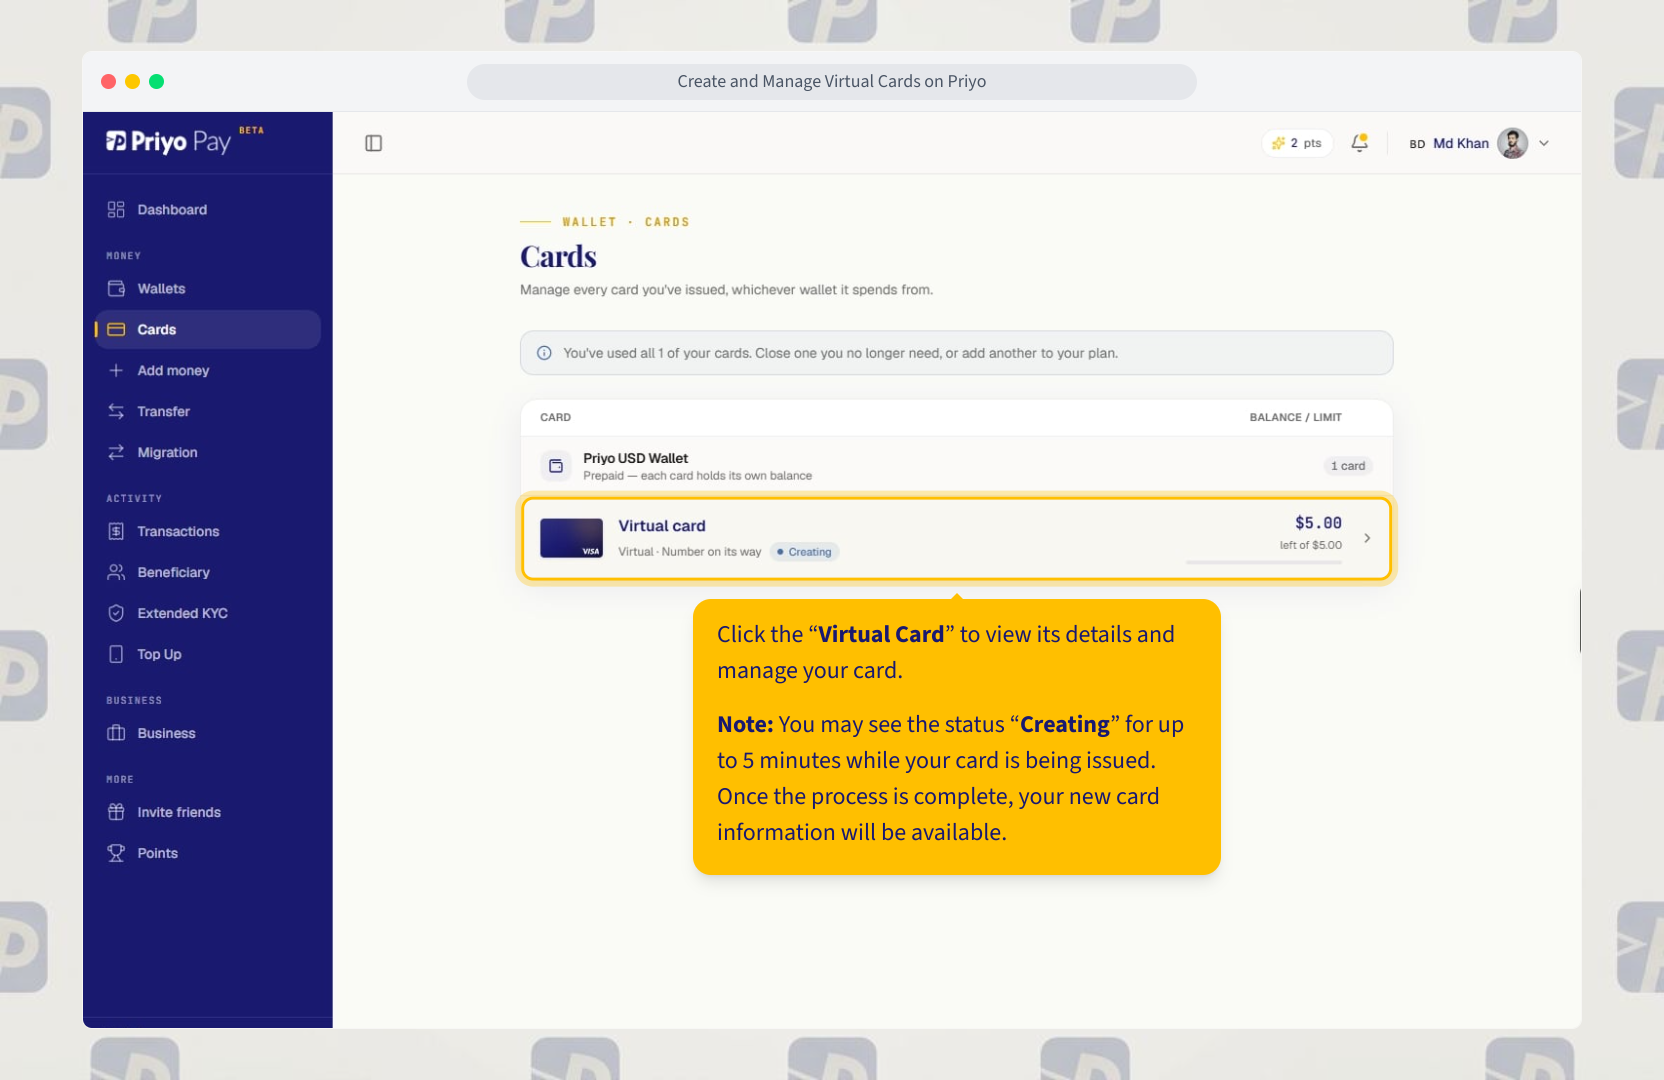
Step 8: Open your virtual card
Click the Virtual Card to view its details and manage your card.
Note: You may see the status Creating for up to 5 minutes while your card is being issued. Once the process is complete, your new card information will be available.
Step 9: View your card information
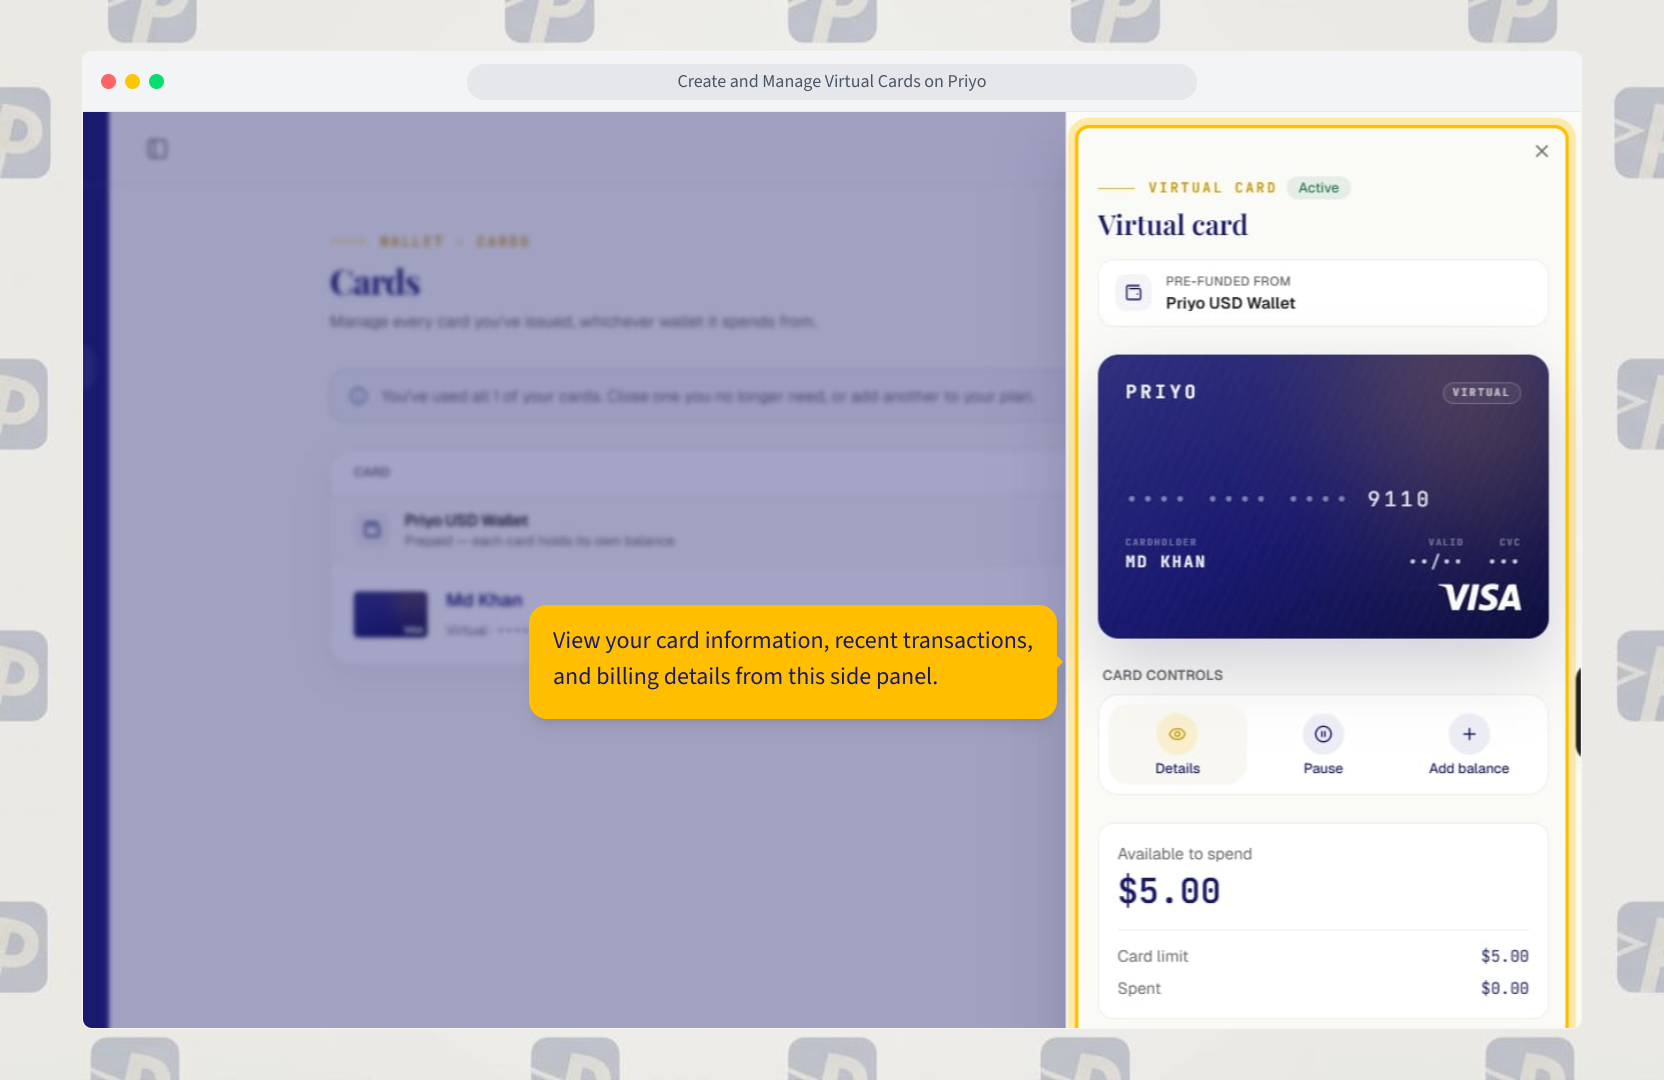
View your card information, recent transactions, and billing details from this side panel.
Step 10: View card details
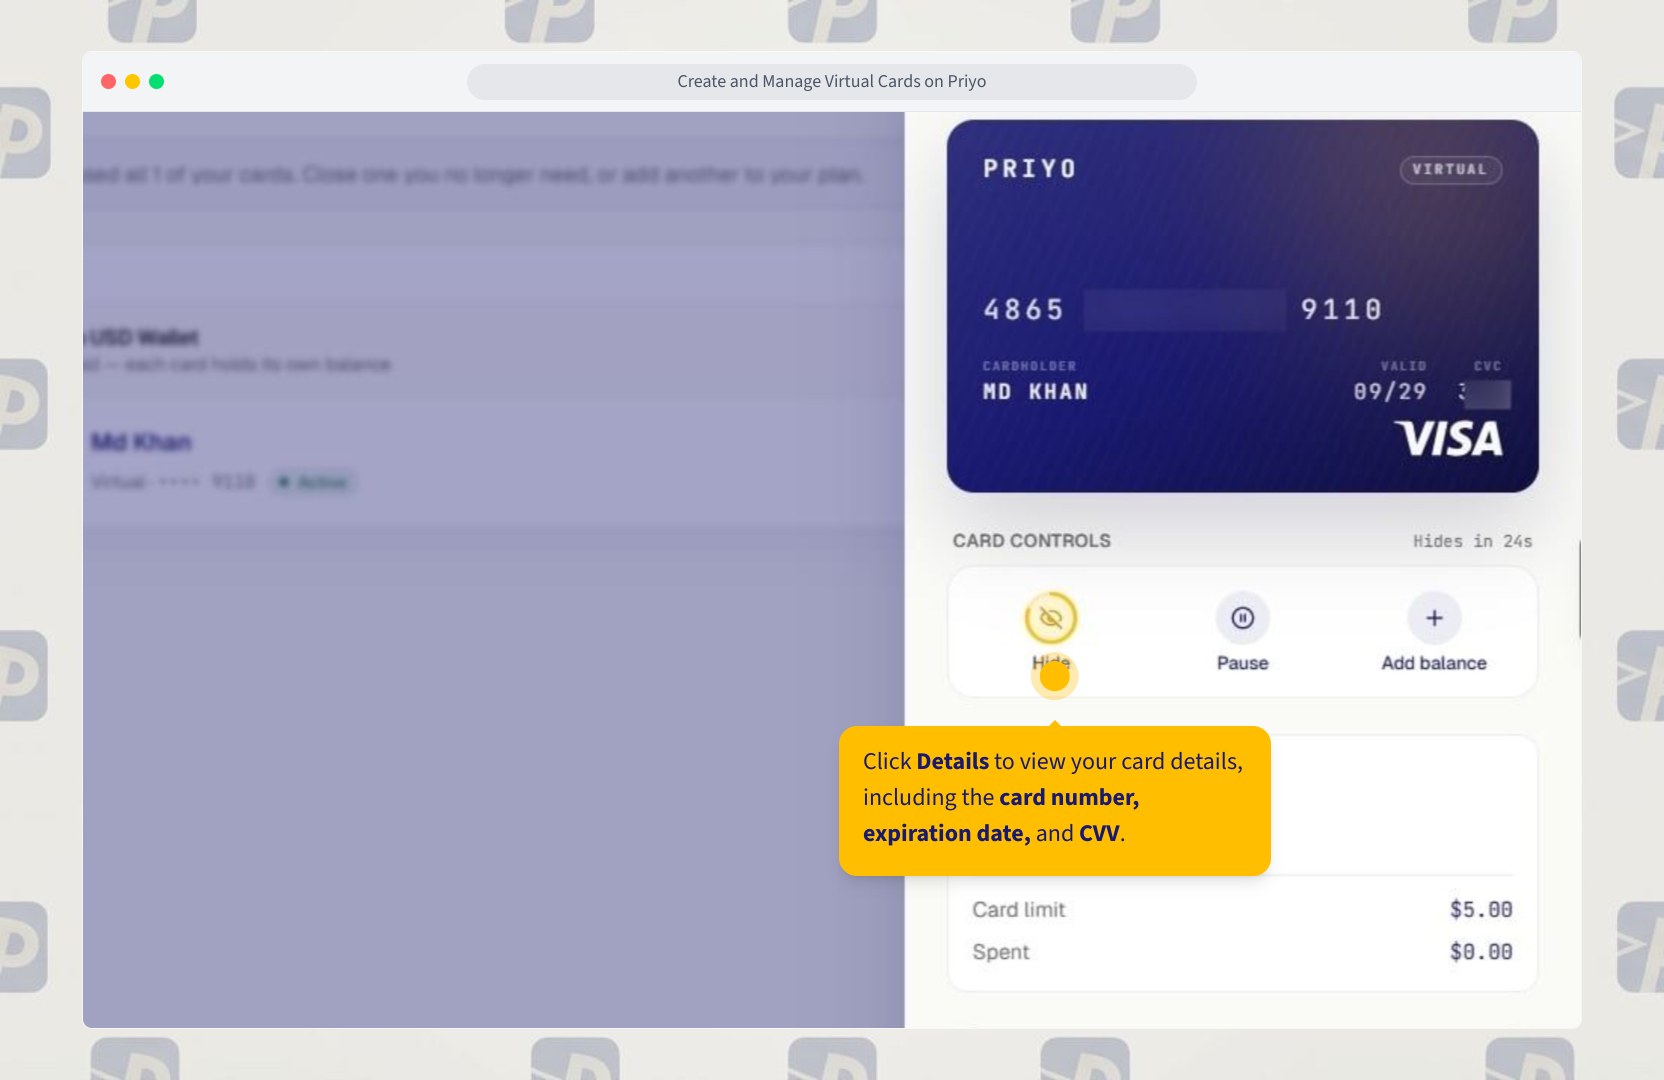
Click Details to view your card details, including the card number, expiration date, and CVV.
Step 11: Pause your card
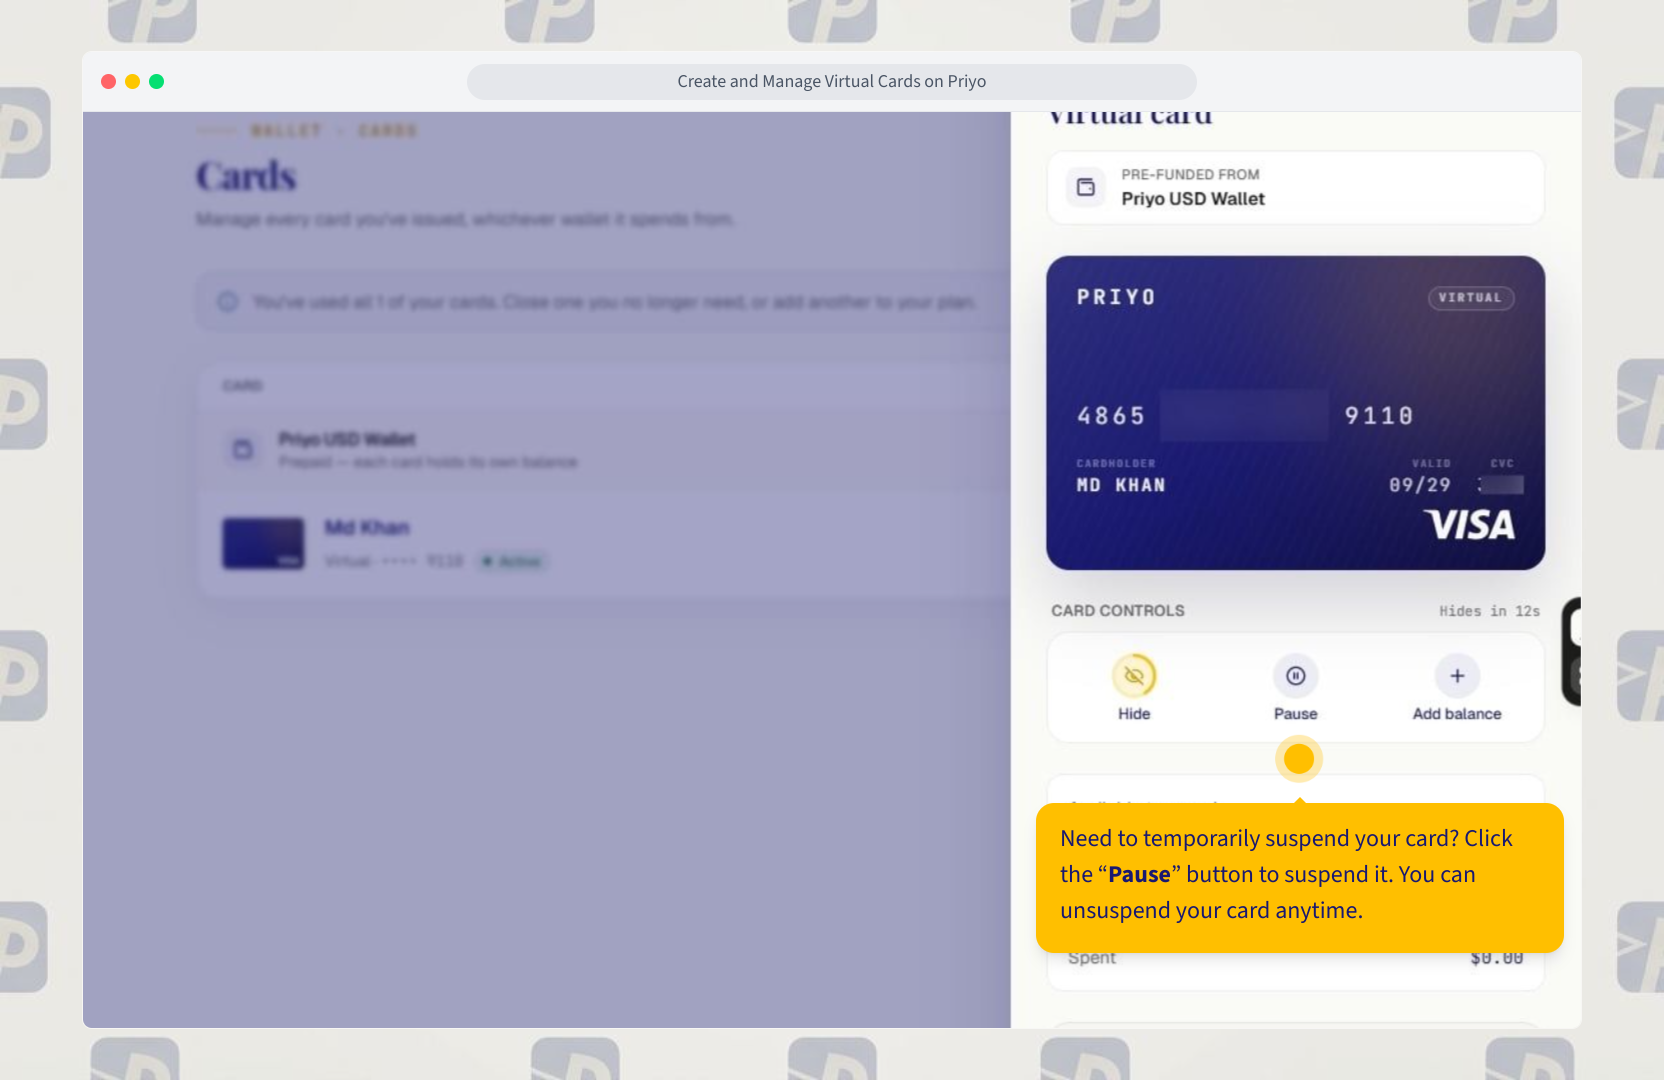
Need to temporarily suspend your card? Click the Pause button to suspend it.
You can unsuspend your card anytime.
Step 12: Add balance to your card
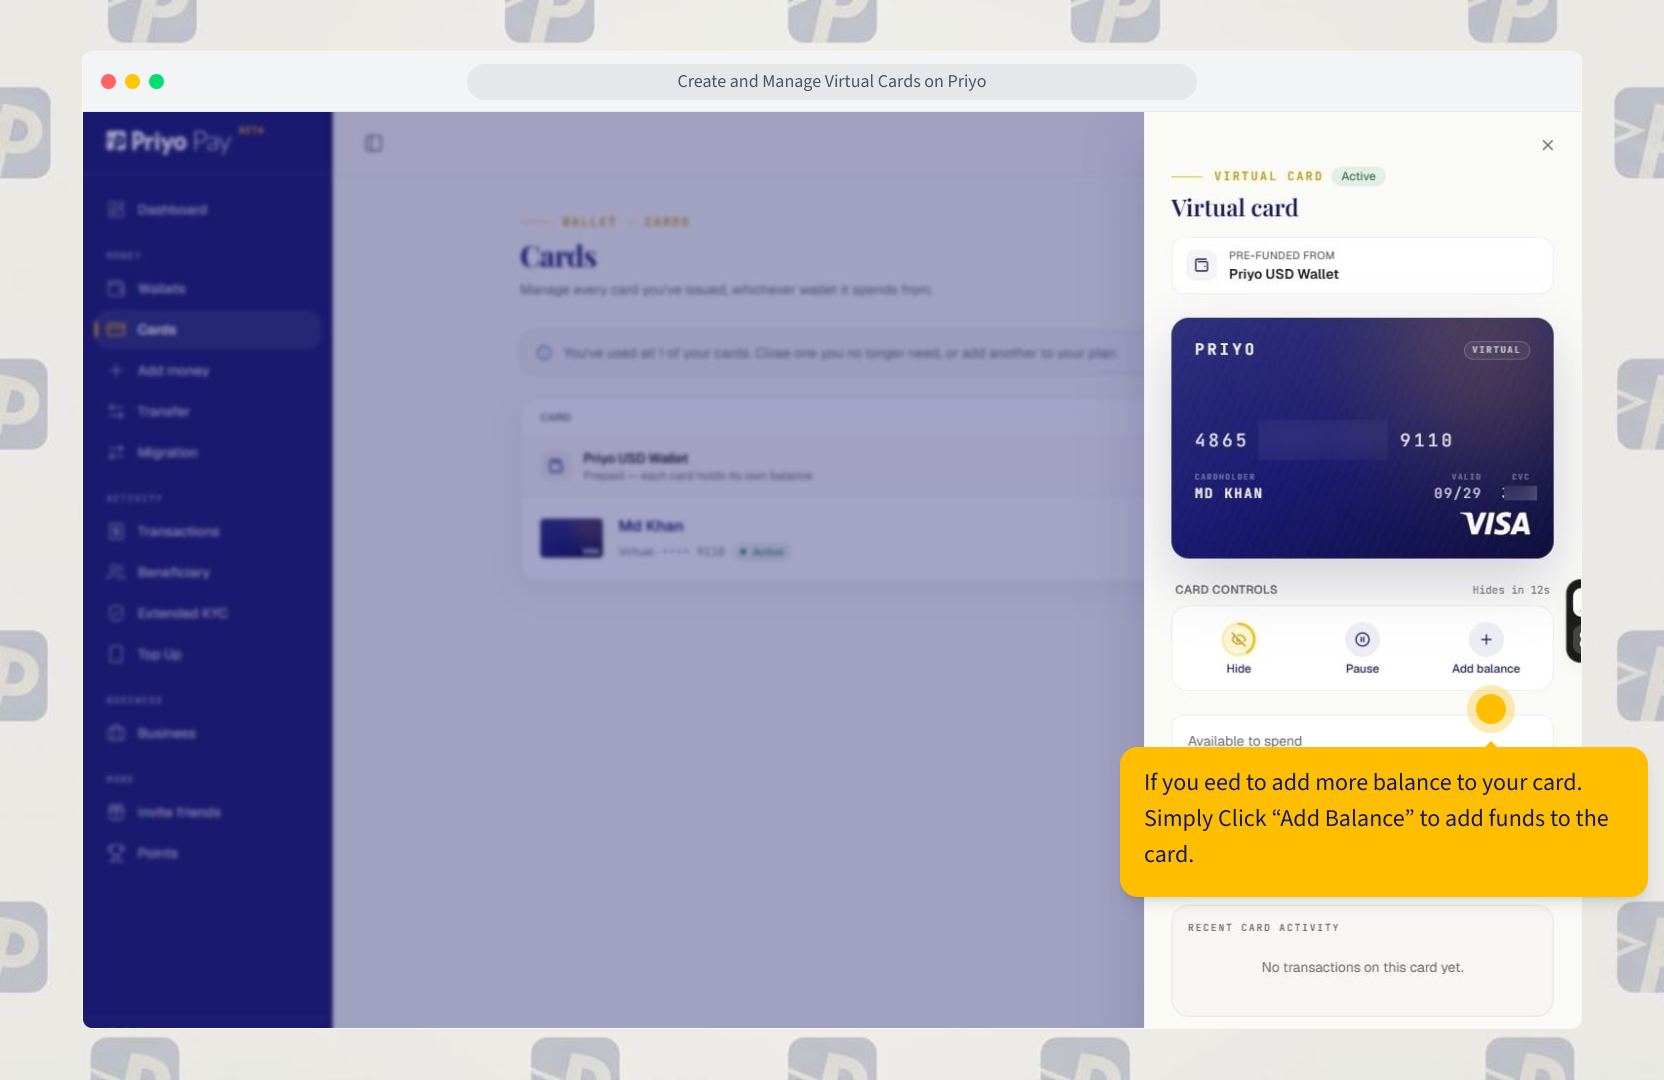
If you need to add more balance to your card, simply click Add Balance to add funds to the card.
Updated on: 17/10/2026
Thank you!