
How to Get Your New Priyo Personal USD Account Info
Approval Timeline:
In US Business Hours: Within a few minutes
Outside Business Hours: Next working day
Follow these steps to get your new Priyo USD Account information.
Video Tutorial:
1. Open Your Priyo Account
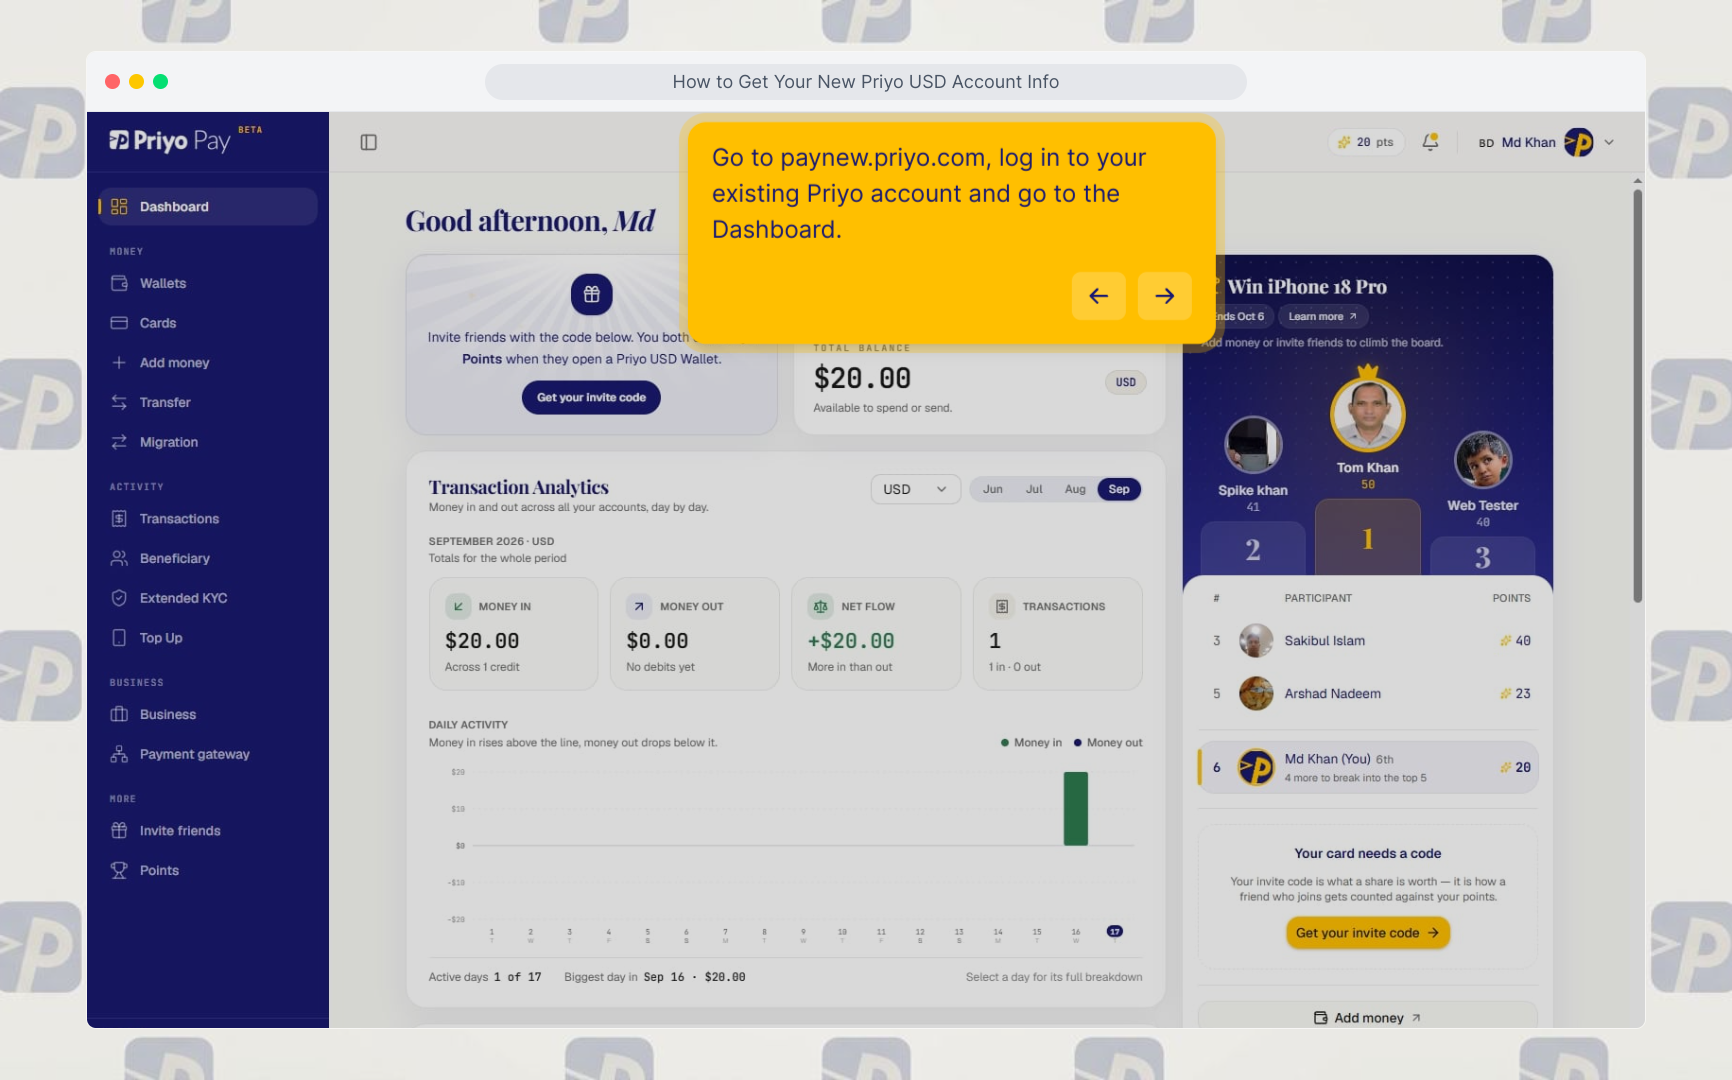
Go to paynew.priyo.com, log in to your existing Priyo account, and go to the Dashboard.
2. Go to Extended KYC
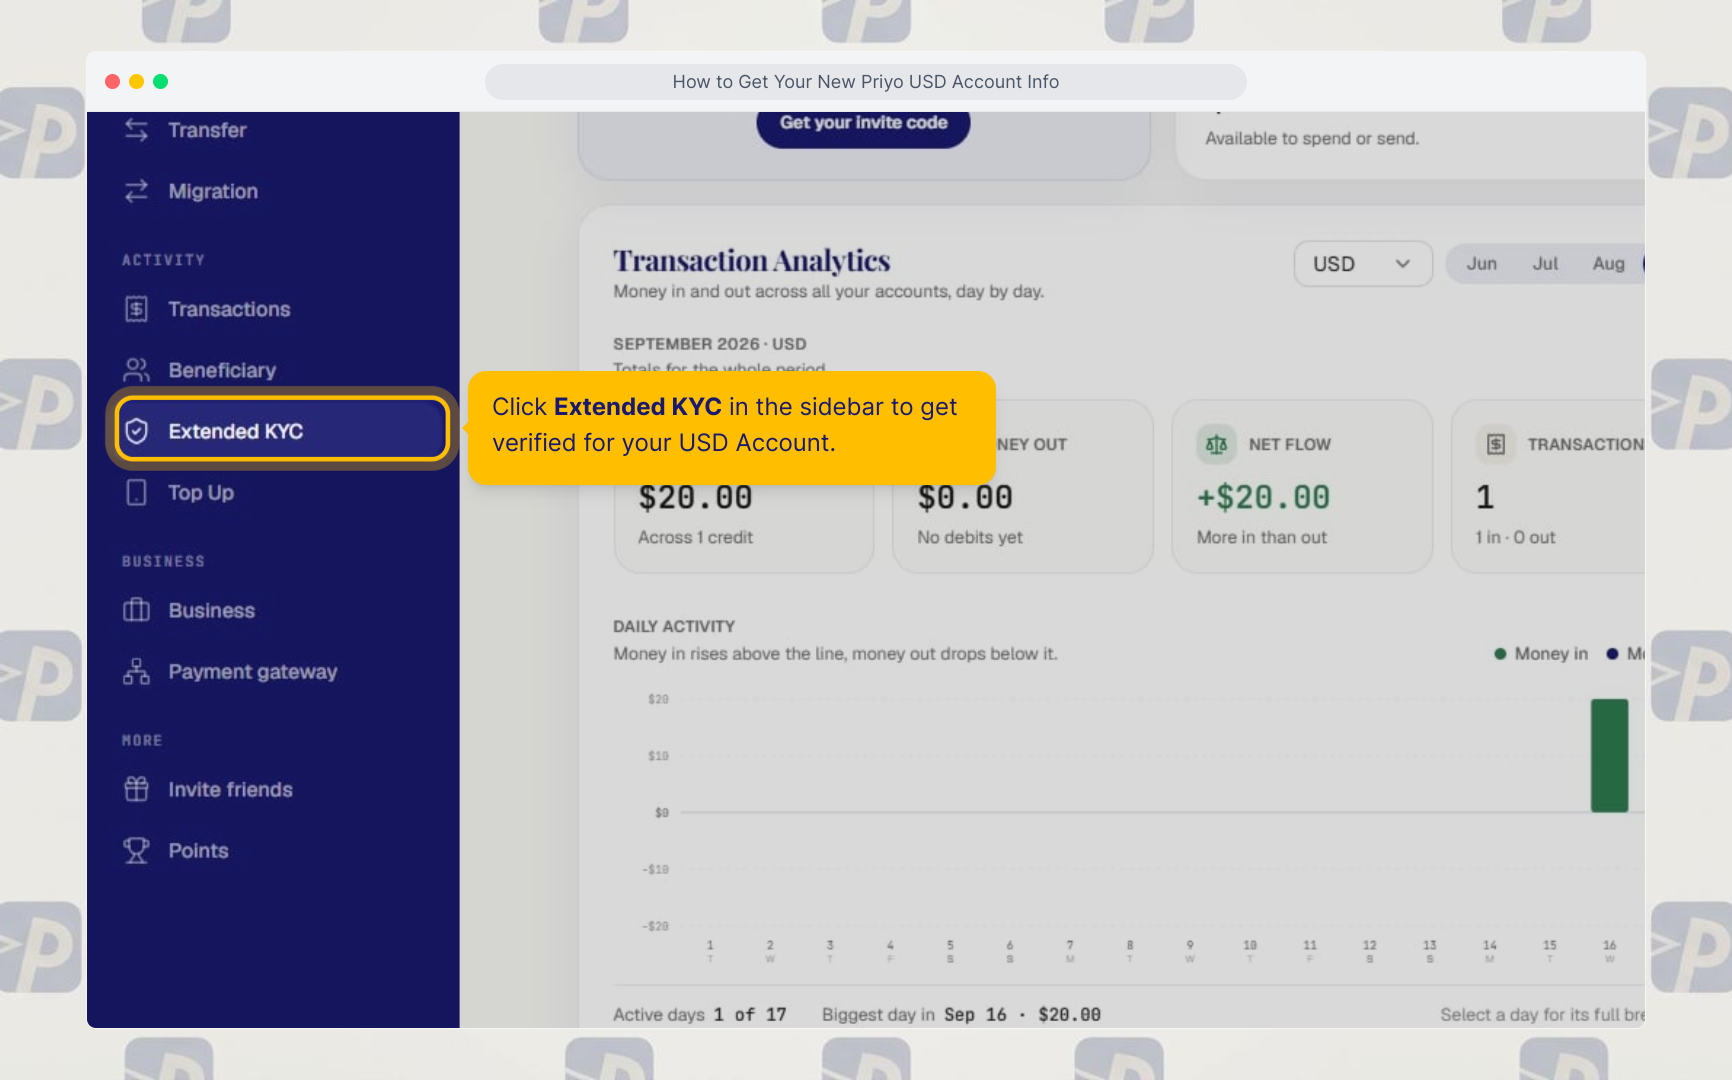
Click Extended KYC in the sidebar to get verified for your USD Account.
3. Start Extended KYC
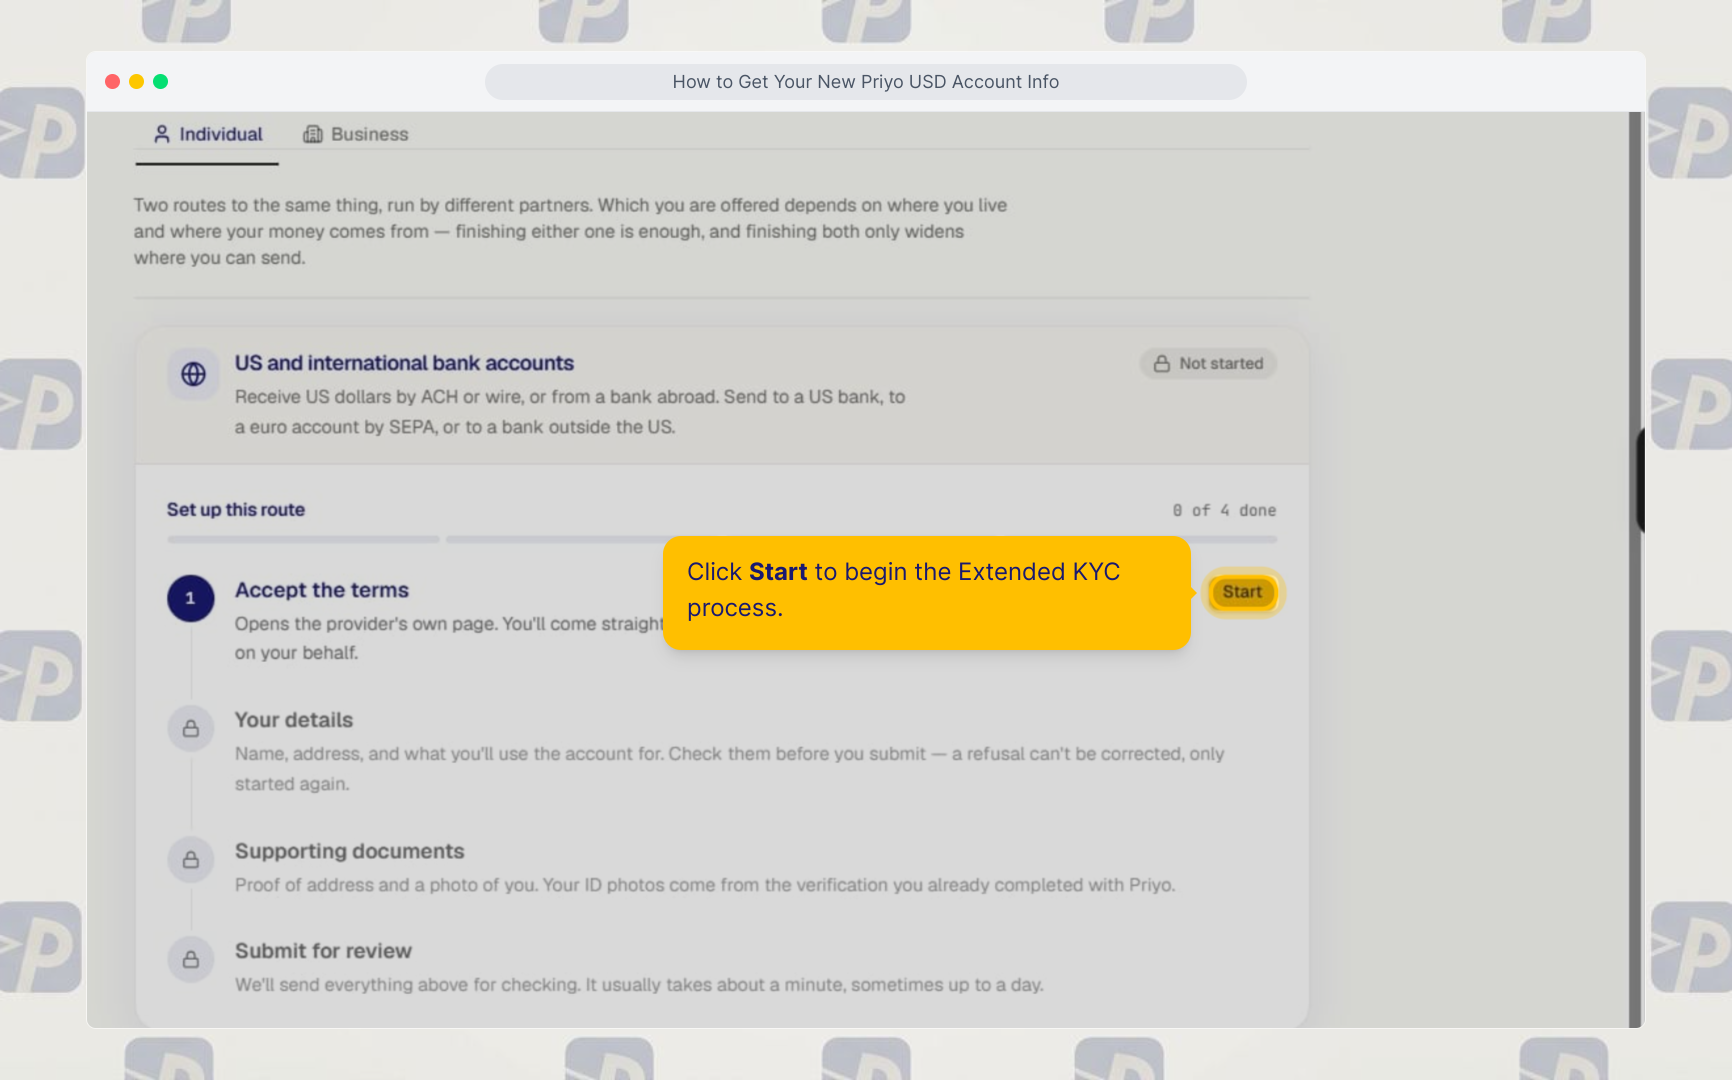
Click Start to begin the Extended KYC process.
4. Accept the Terms
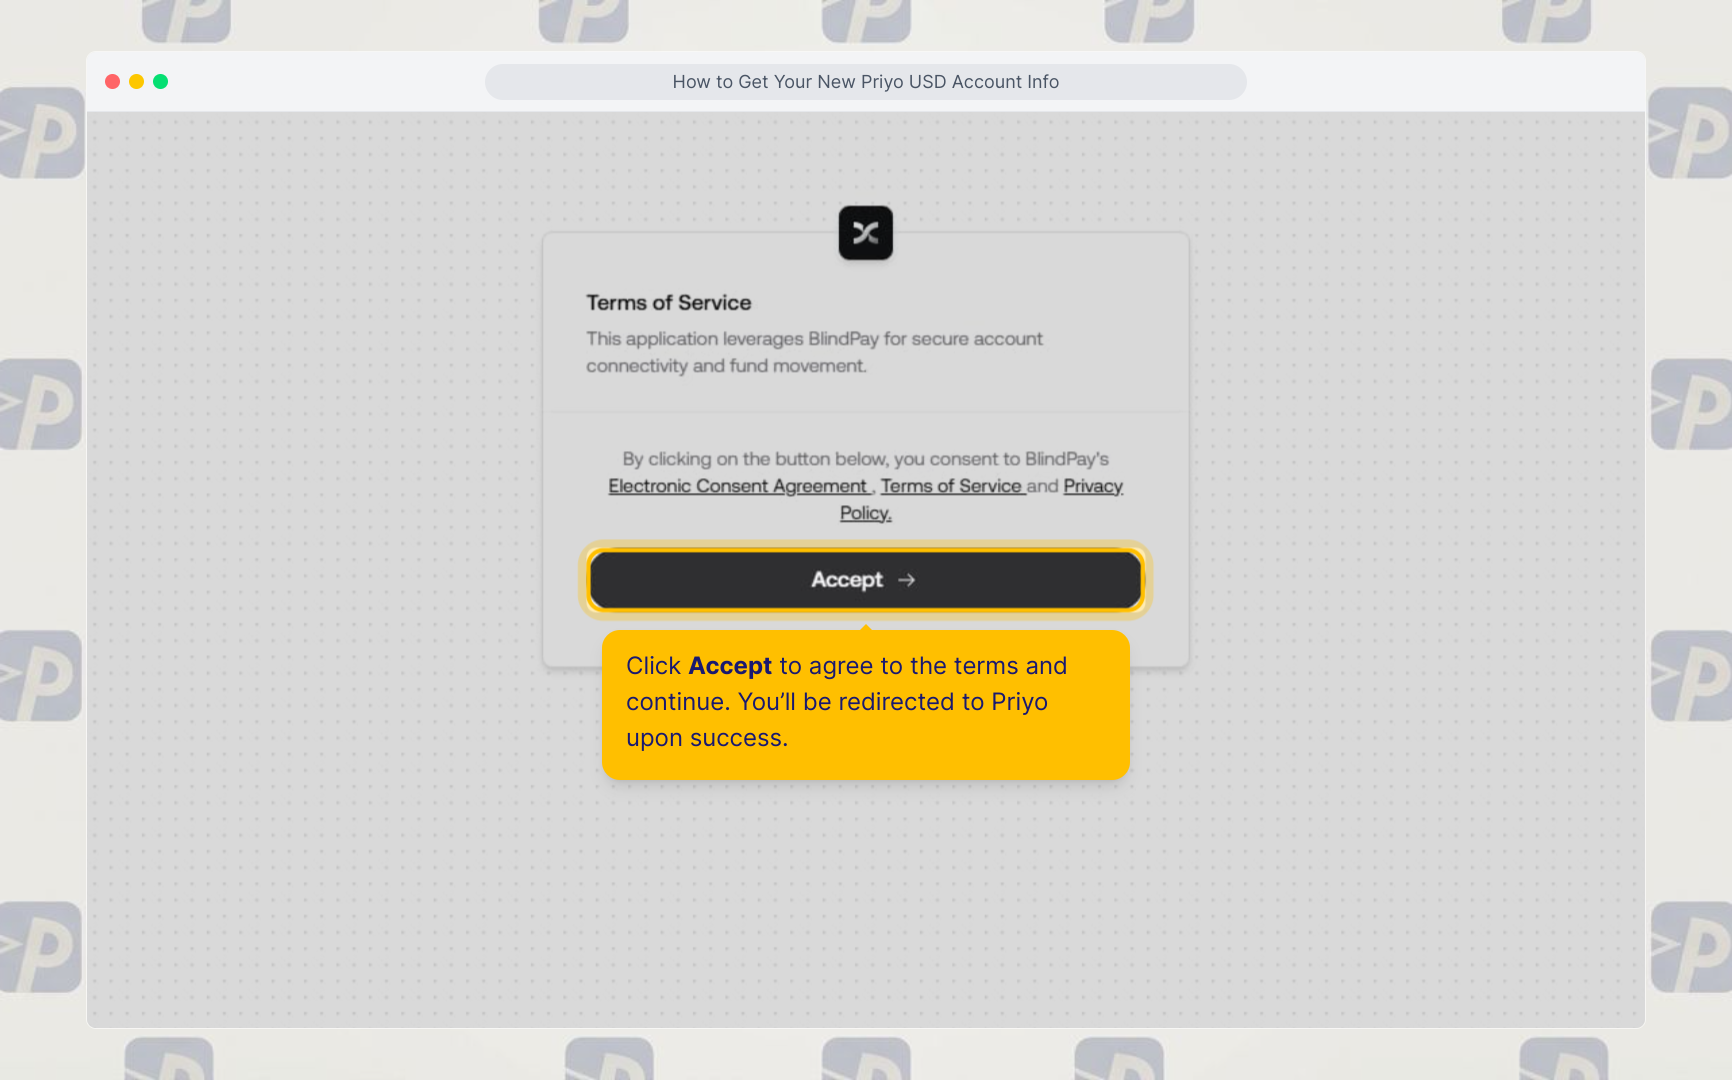
Click Accept to agree to the terms and continue. You’ll be redirected to Priyo upon successful completion.
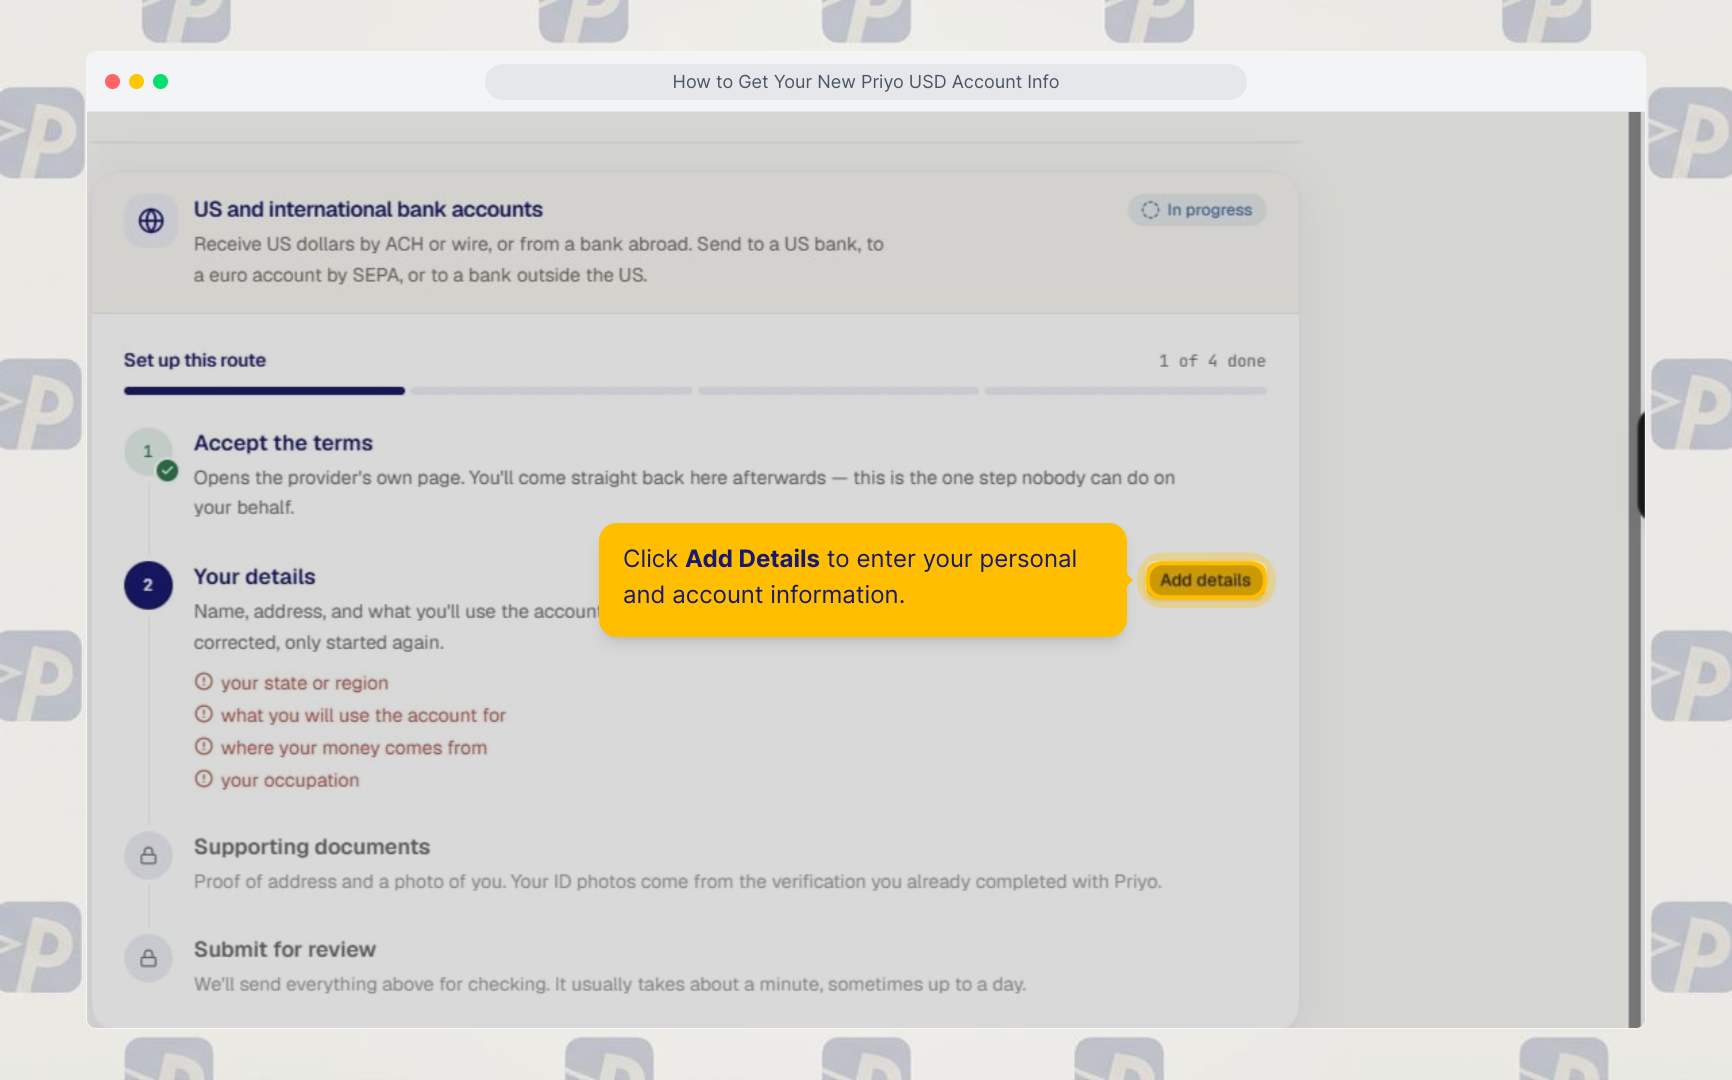
5. Add Your Details
Click Add Details to enter your personal and account information.
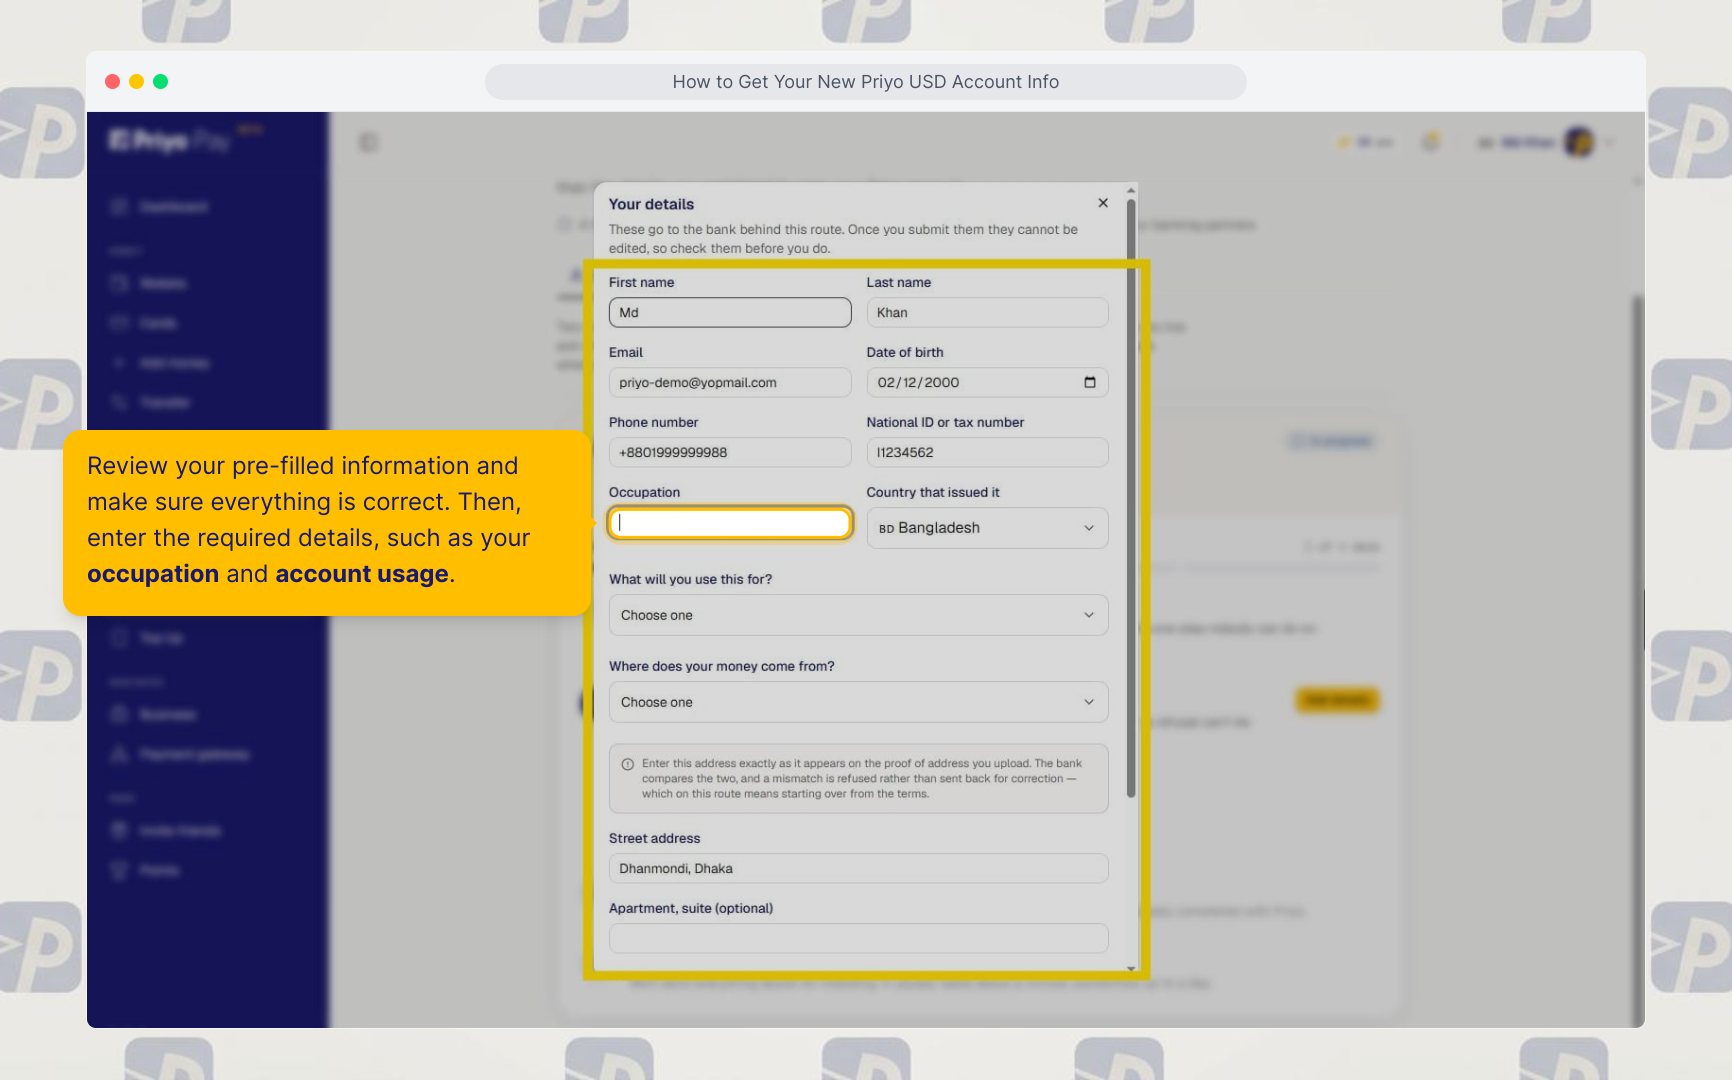
6. Review Your Information
Review your pre-filled information and make sure everything is correct.
Then enter the required details, including:
- Occupation
- Account usage
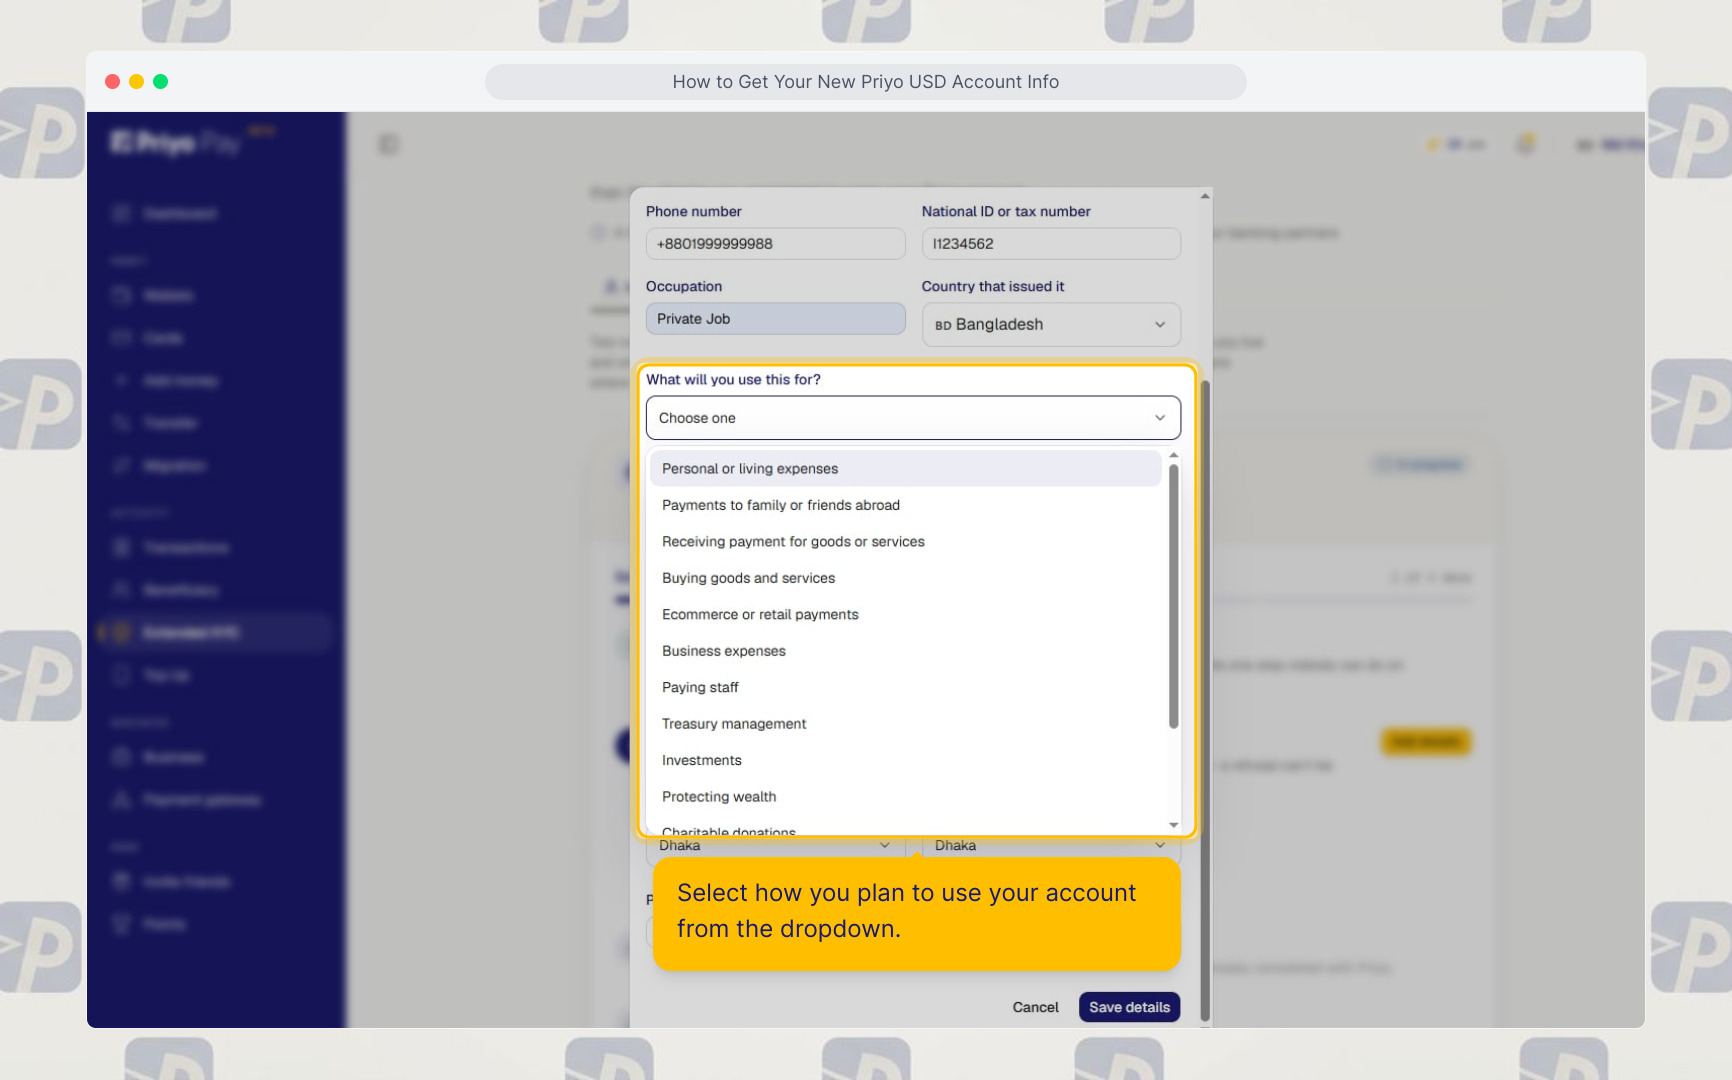
7. Select Your Account Usage
Select how you plan to use your account from the dropdown menu.
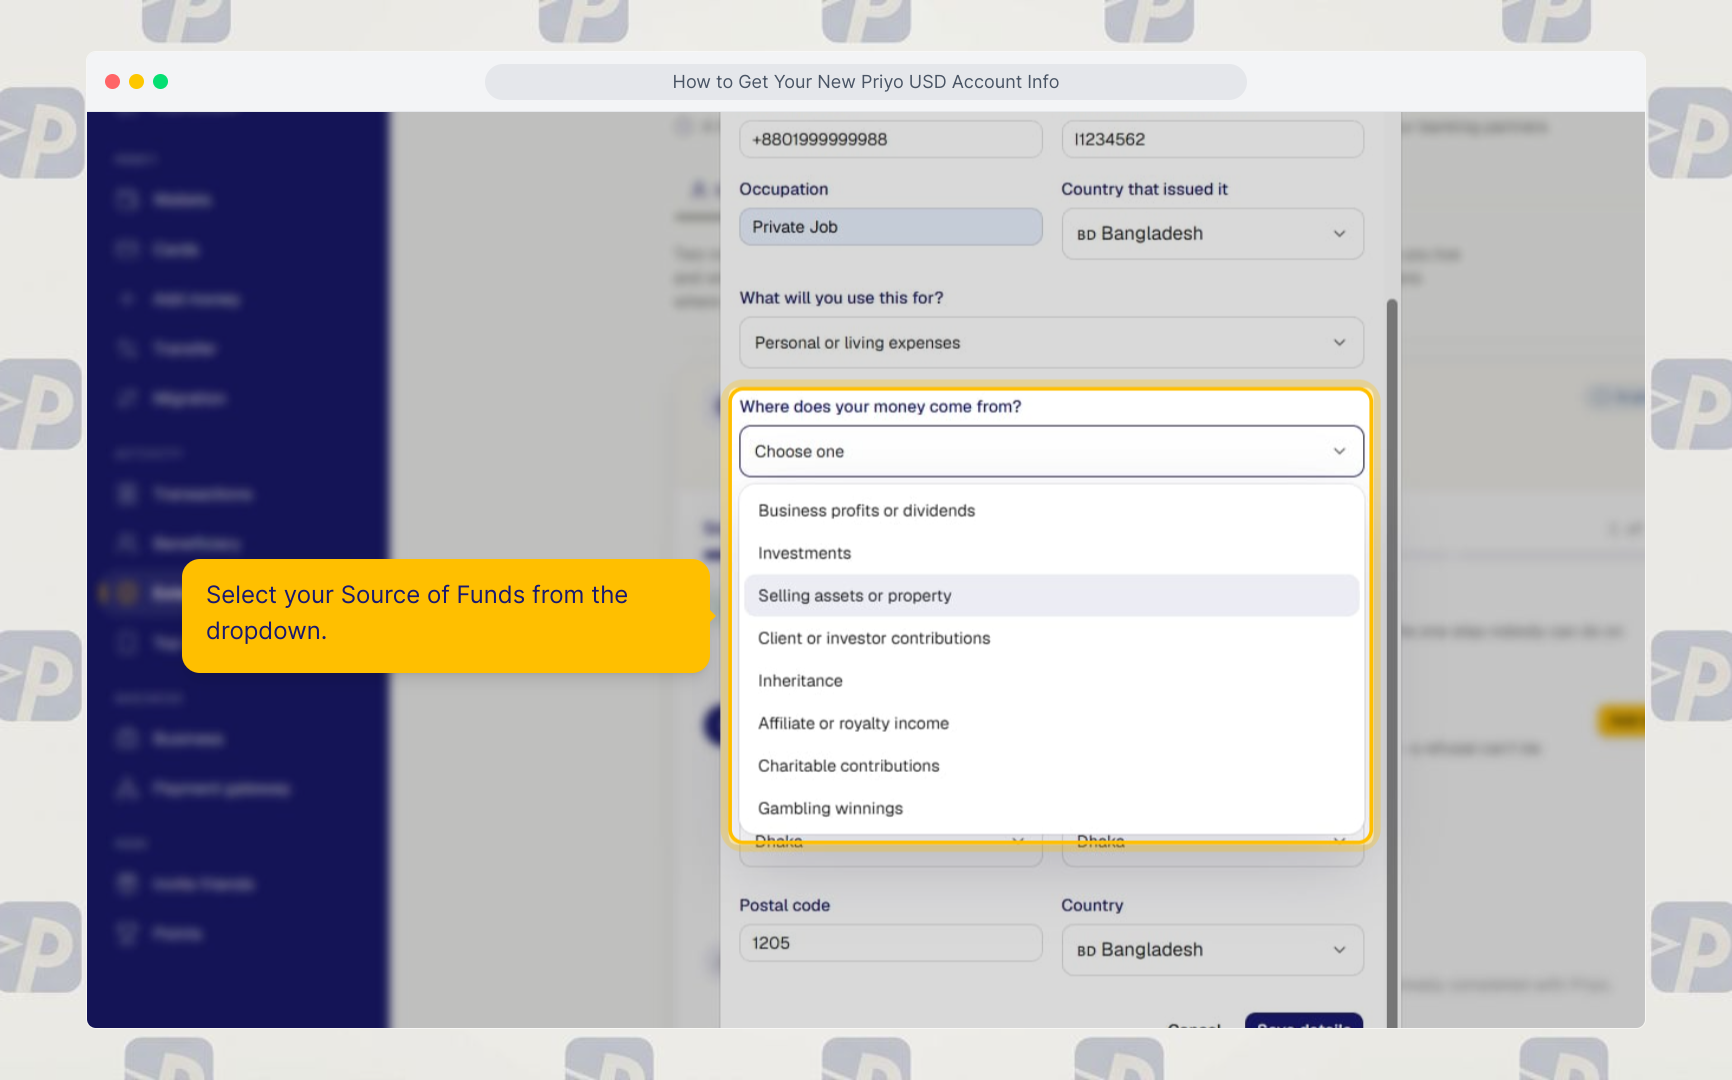
8. Select Your Source of Funds
Select your Source of Funds from the dropdown menu.
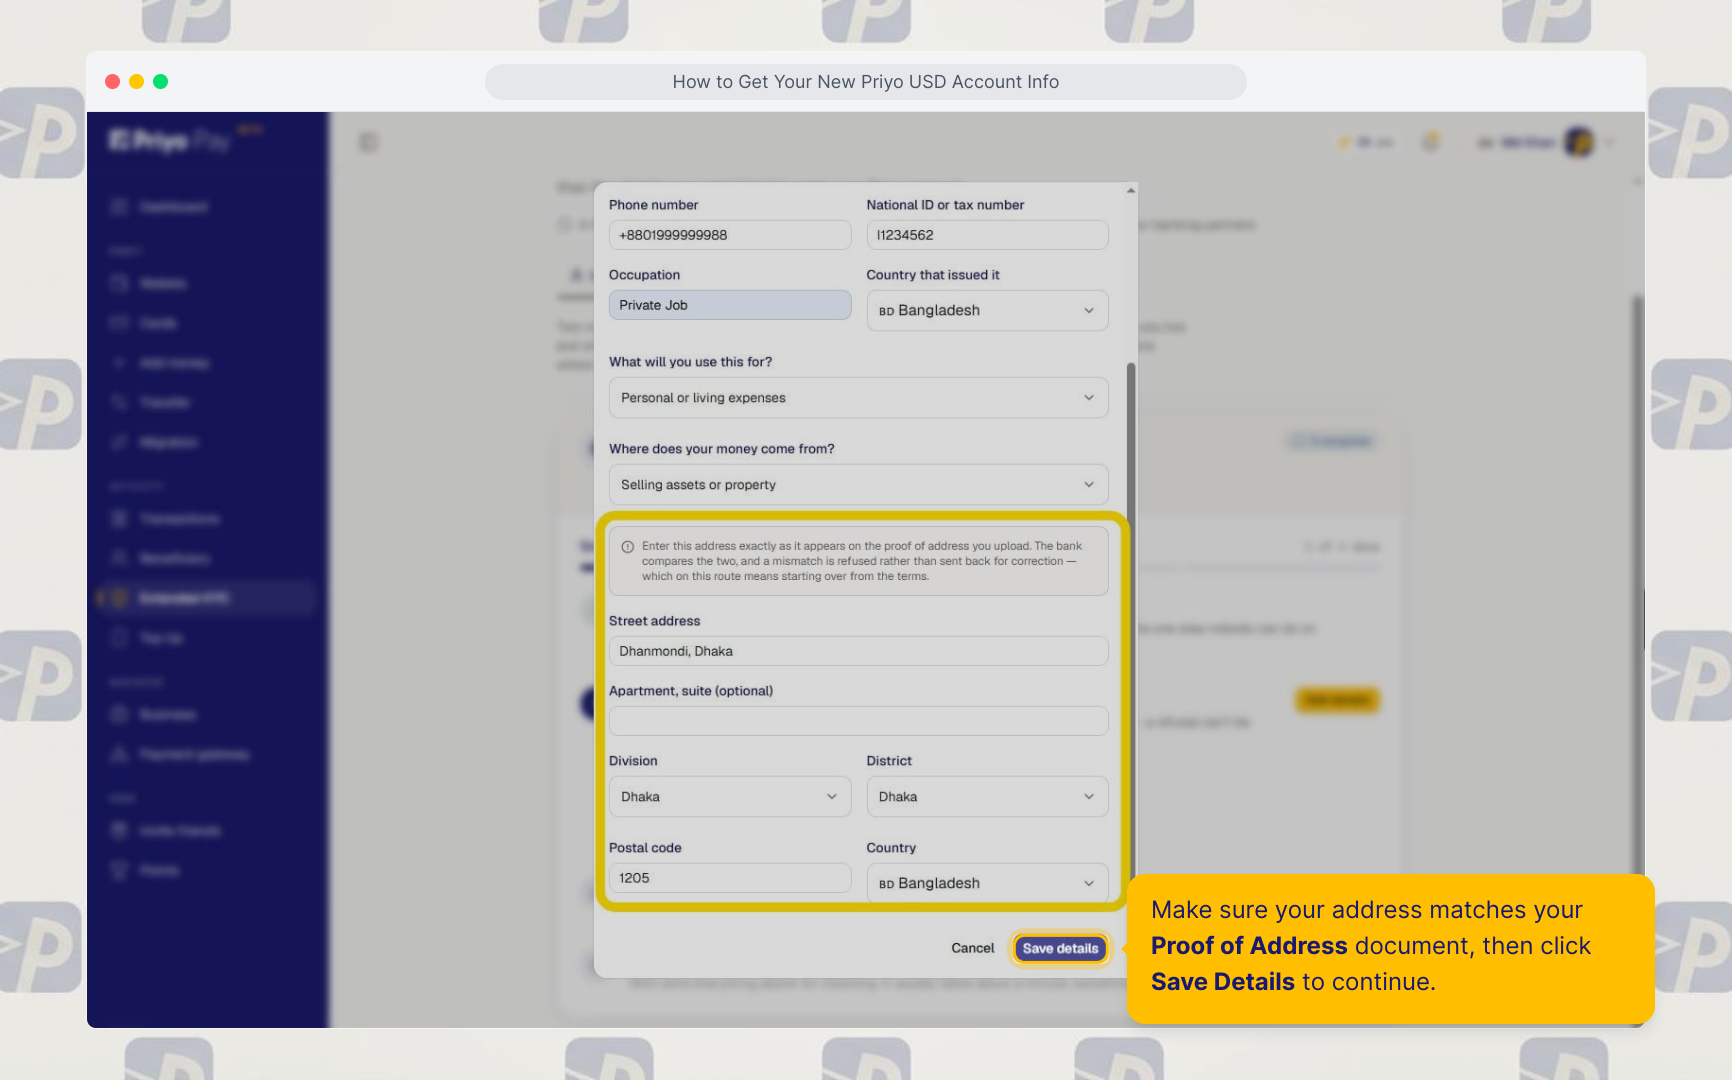
9. Confirm Your Address
Make sure your address exactly matches the address shown on your Proof of Address document.
Then click Save Details.
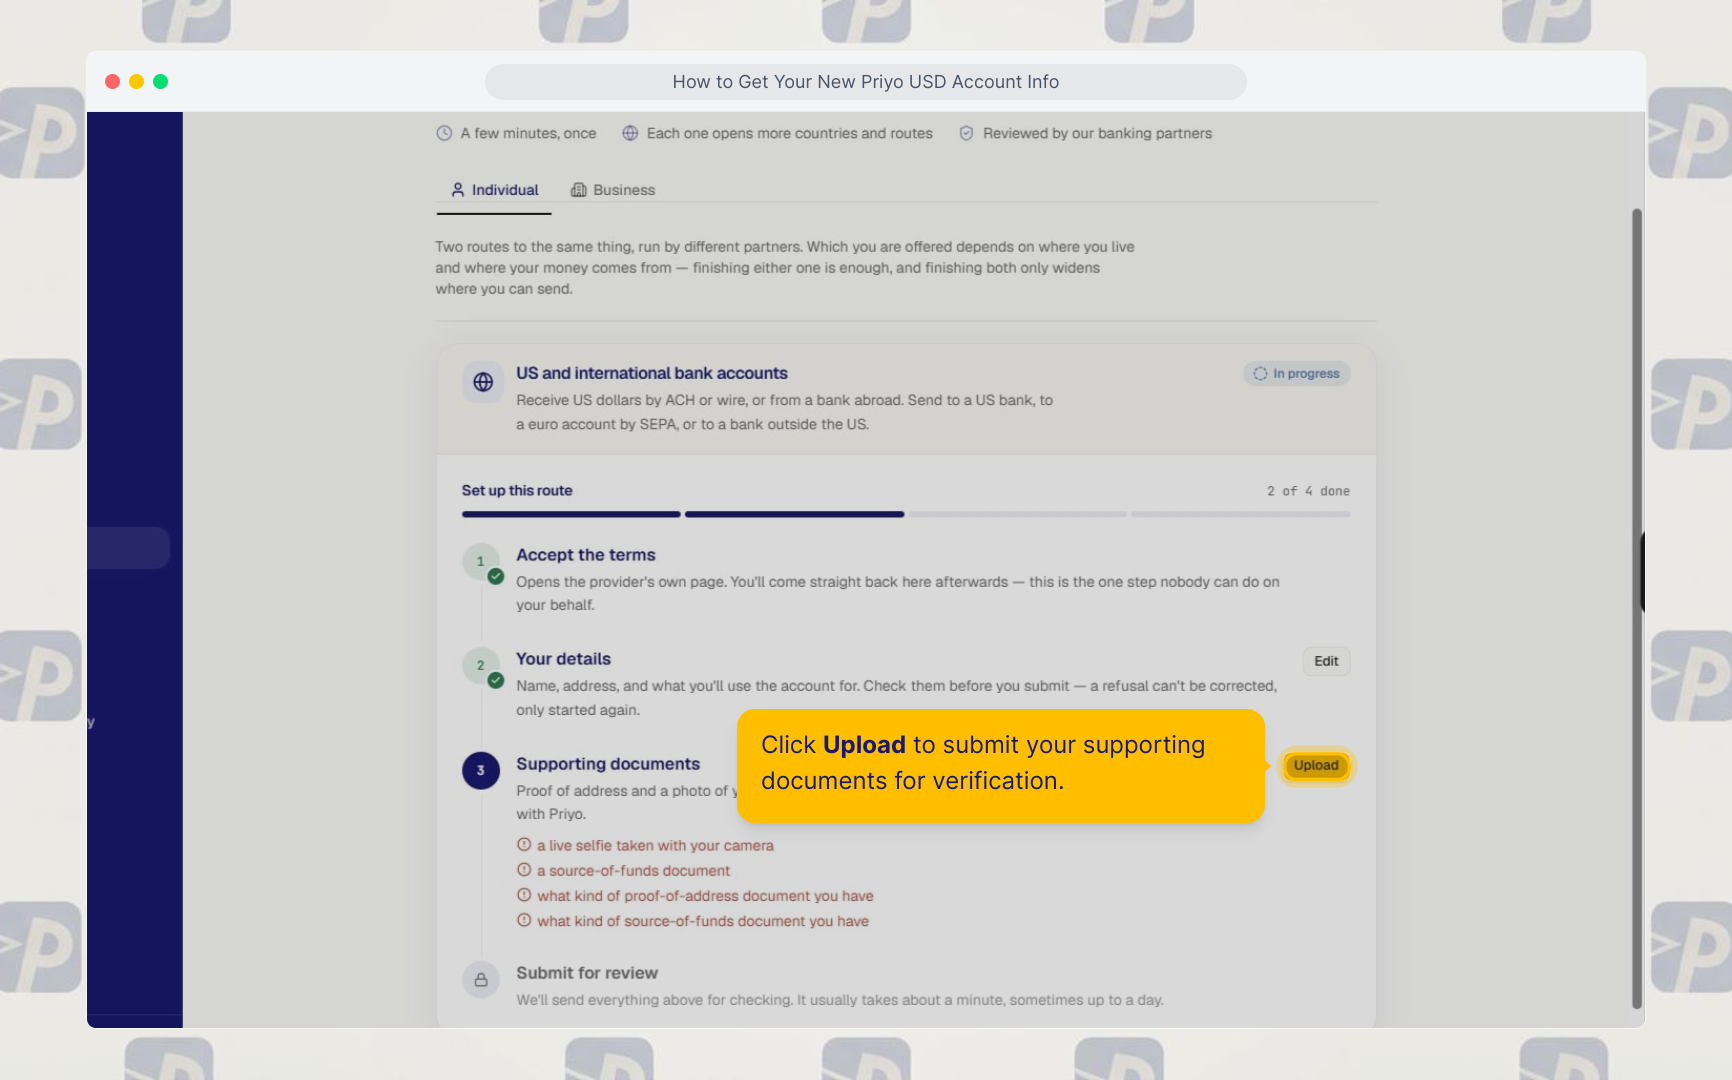
10. Upload Your Documents
Click Upload to submit your supporting documents for verification.
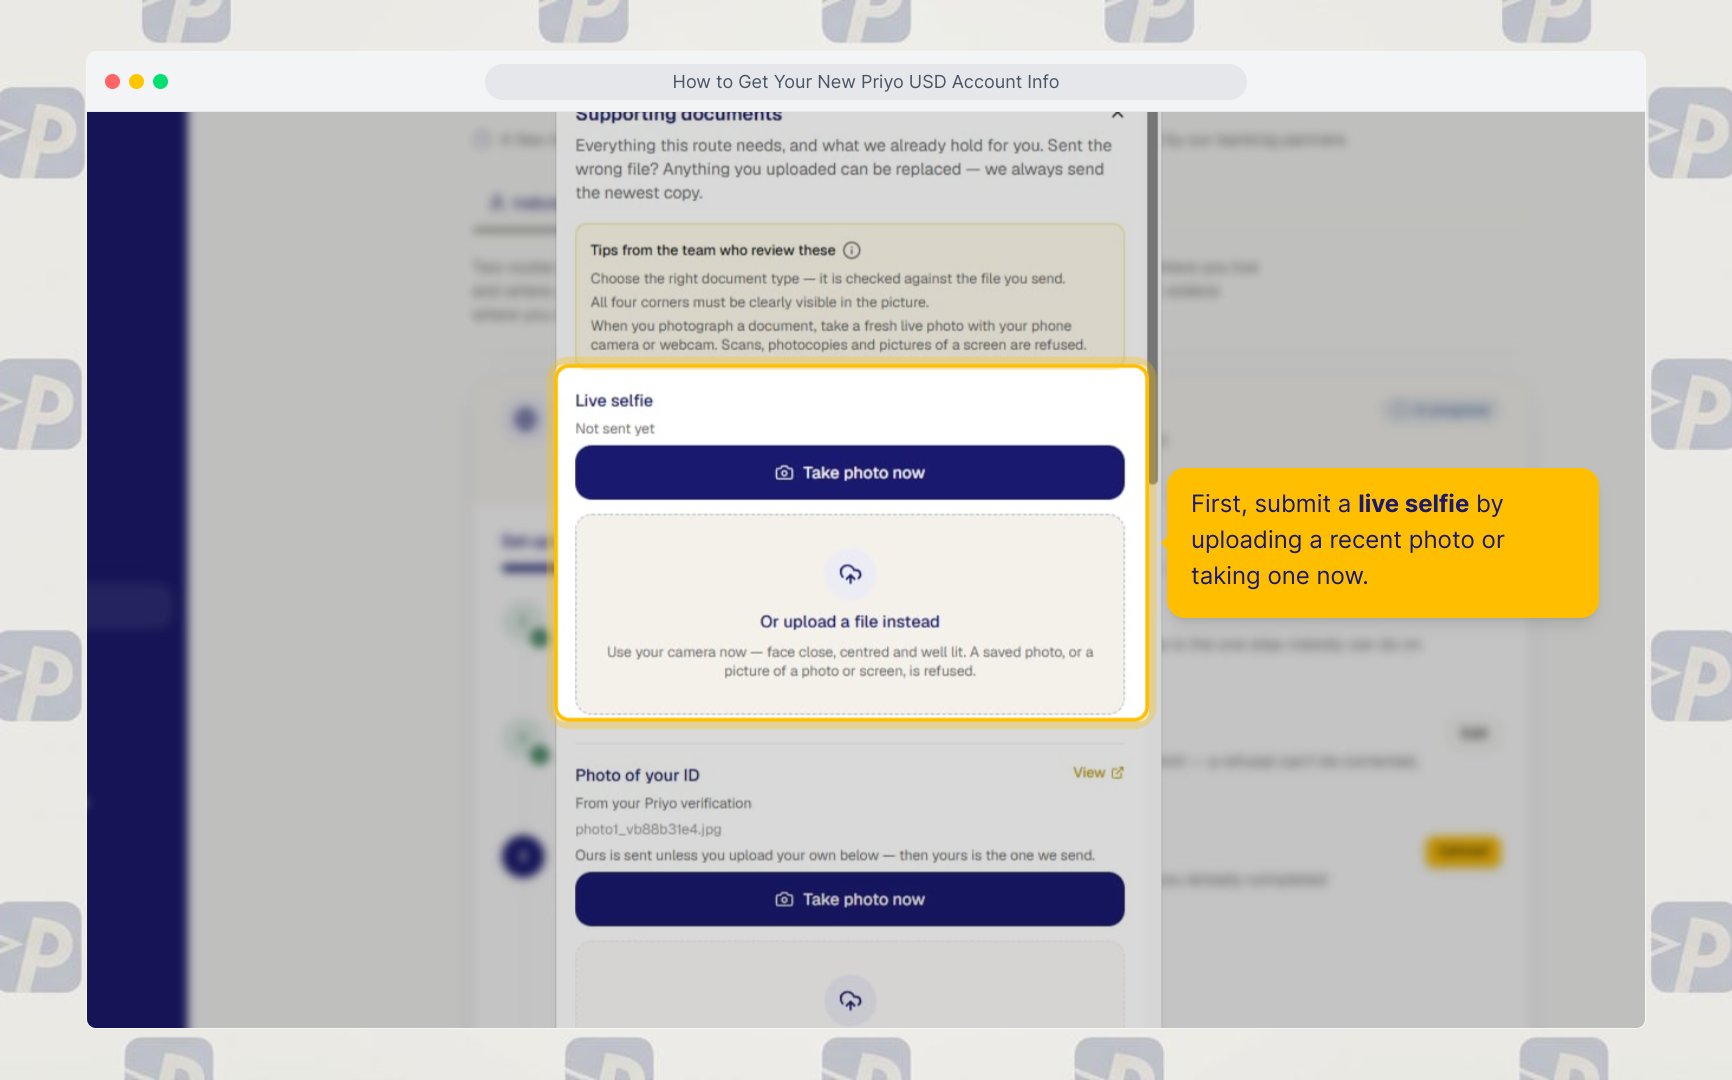
11. Submit Your Live Selfie
Submit a live selfie by uploading a recent photo or taking one during the verification process.
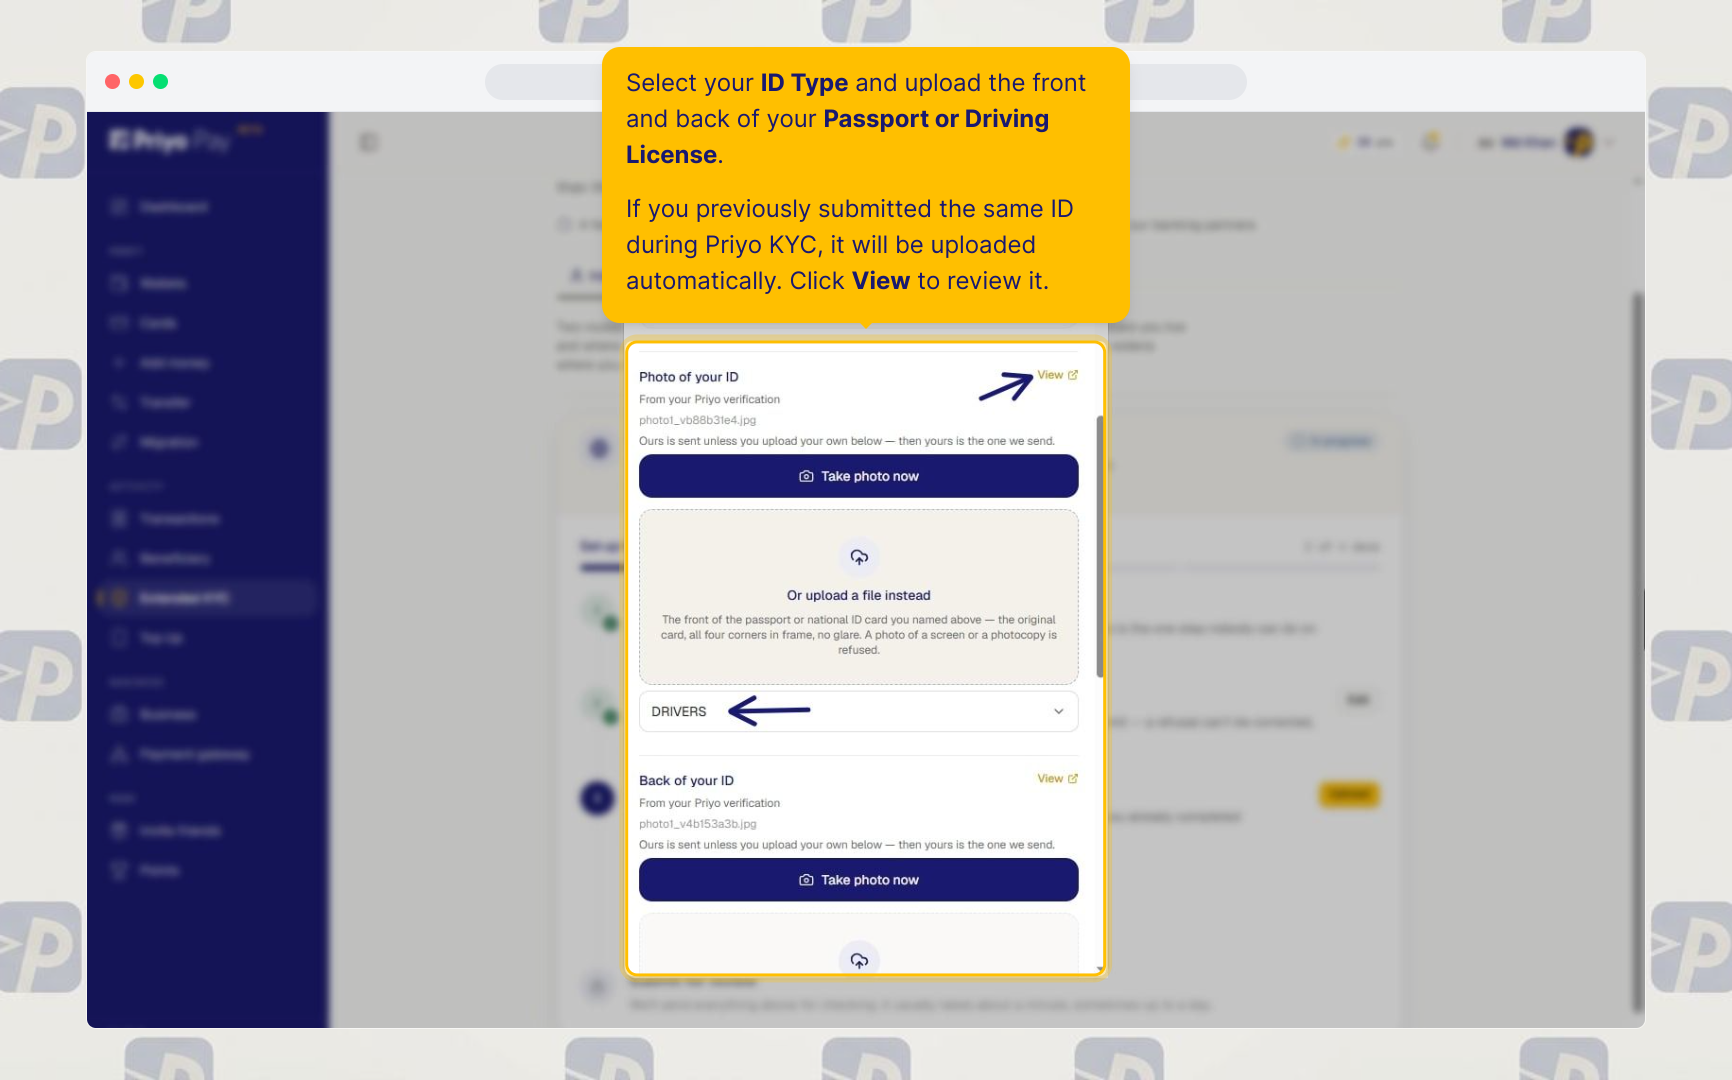
12. Upload Your ID
Select your ID Type and upload the front and back of your Passport or Driving License.
If you previously submitted the same ID during Priyo KYC, it may be uploaded automatically. Click View to review it.
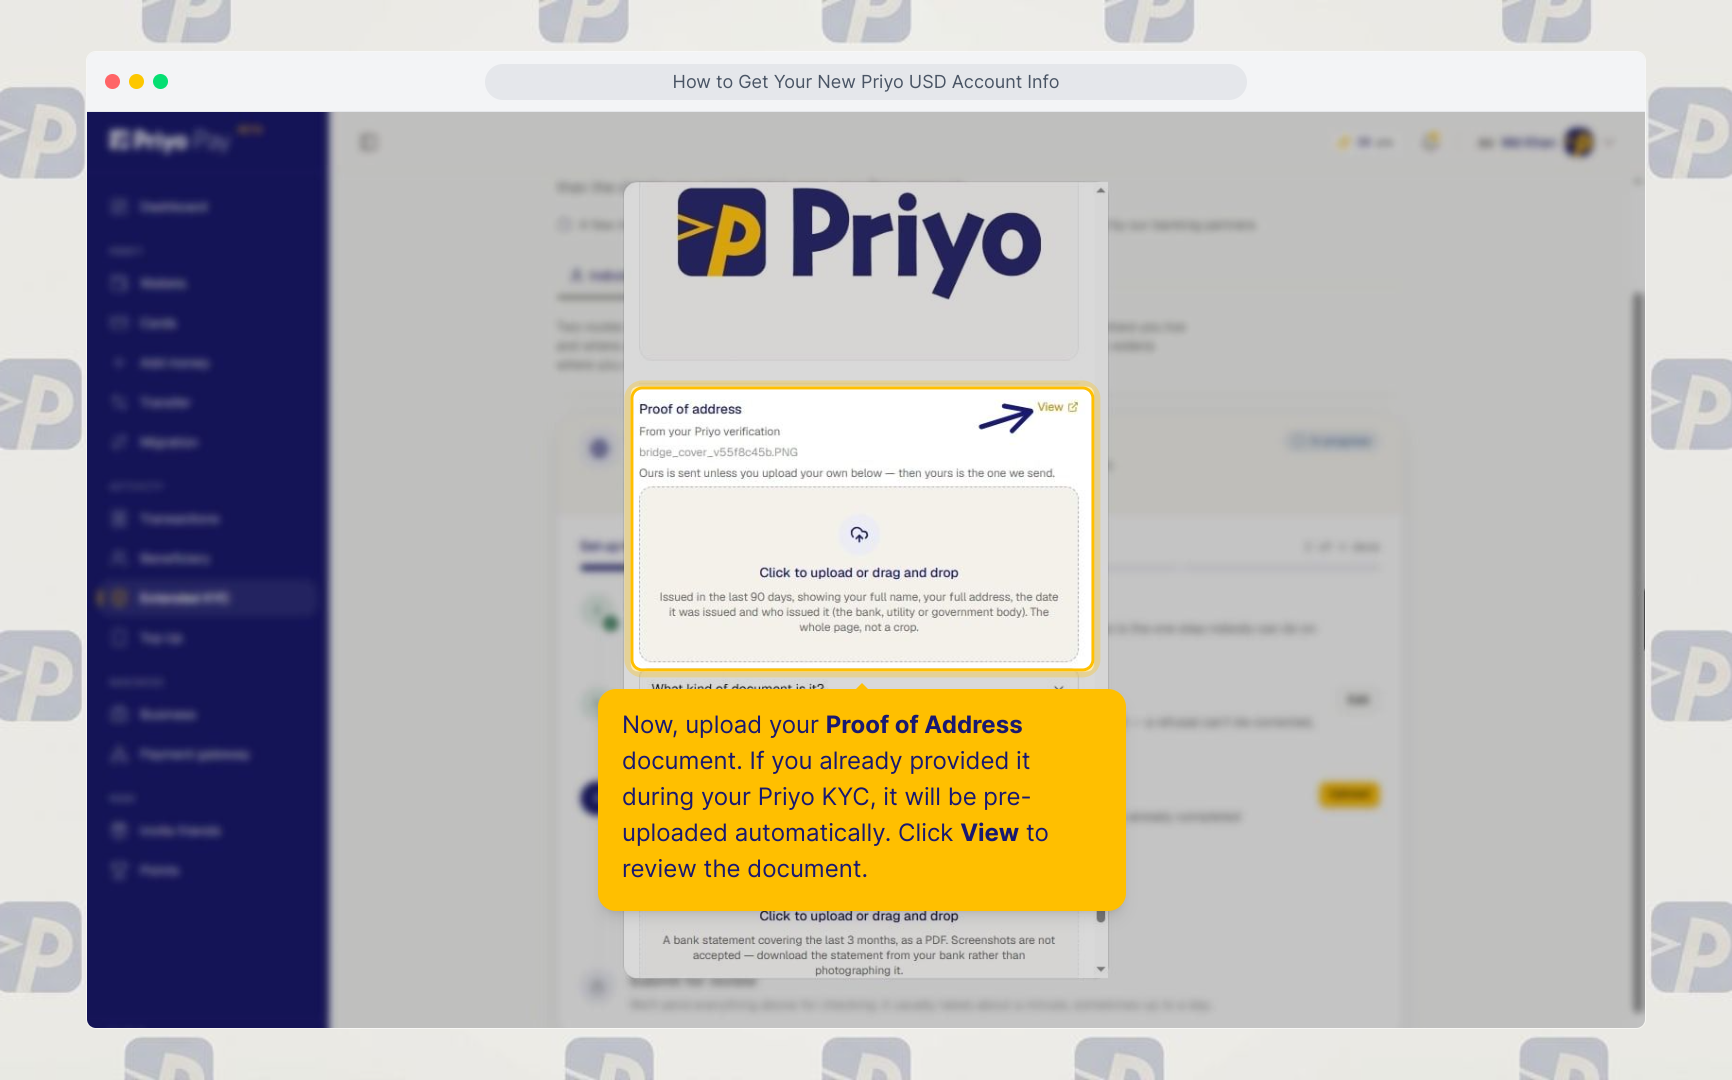
13. Upload Proof of Address
Upload your Proof of Address document.
If you already provided this document during your Priyo KYC, it may be pre-uploaded automatically. Click View to review the document.
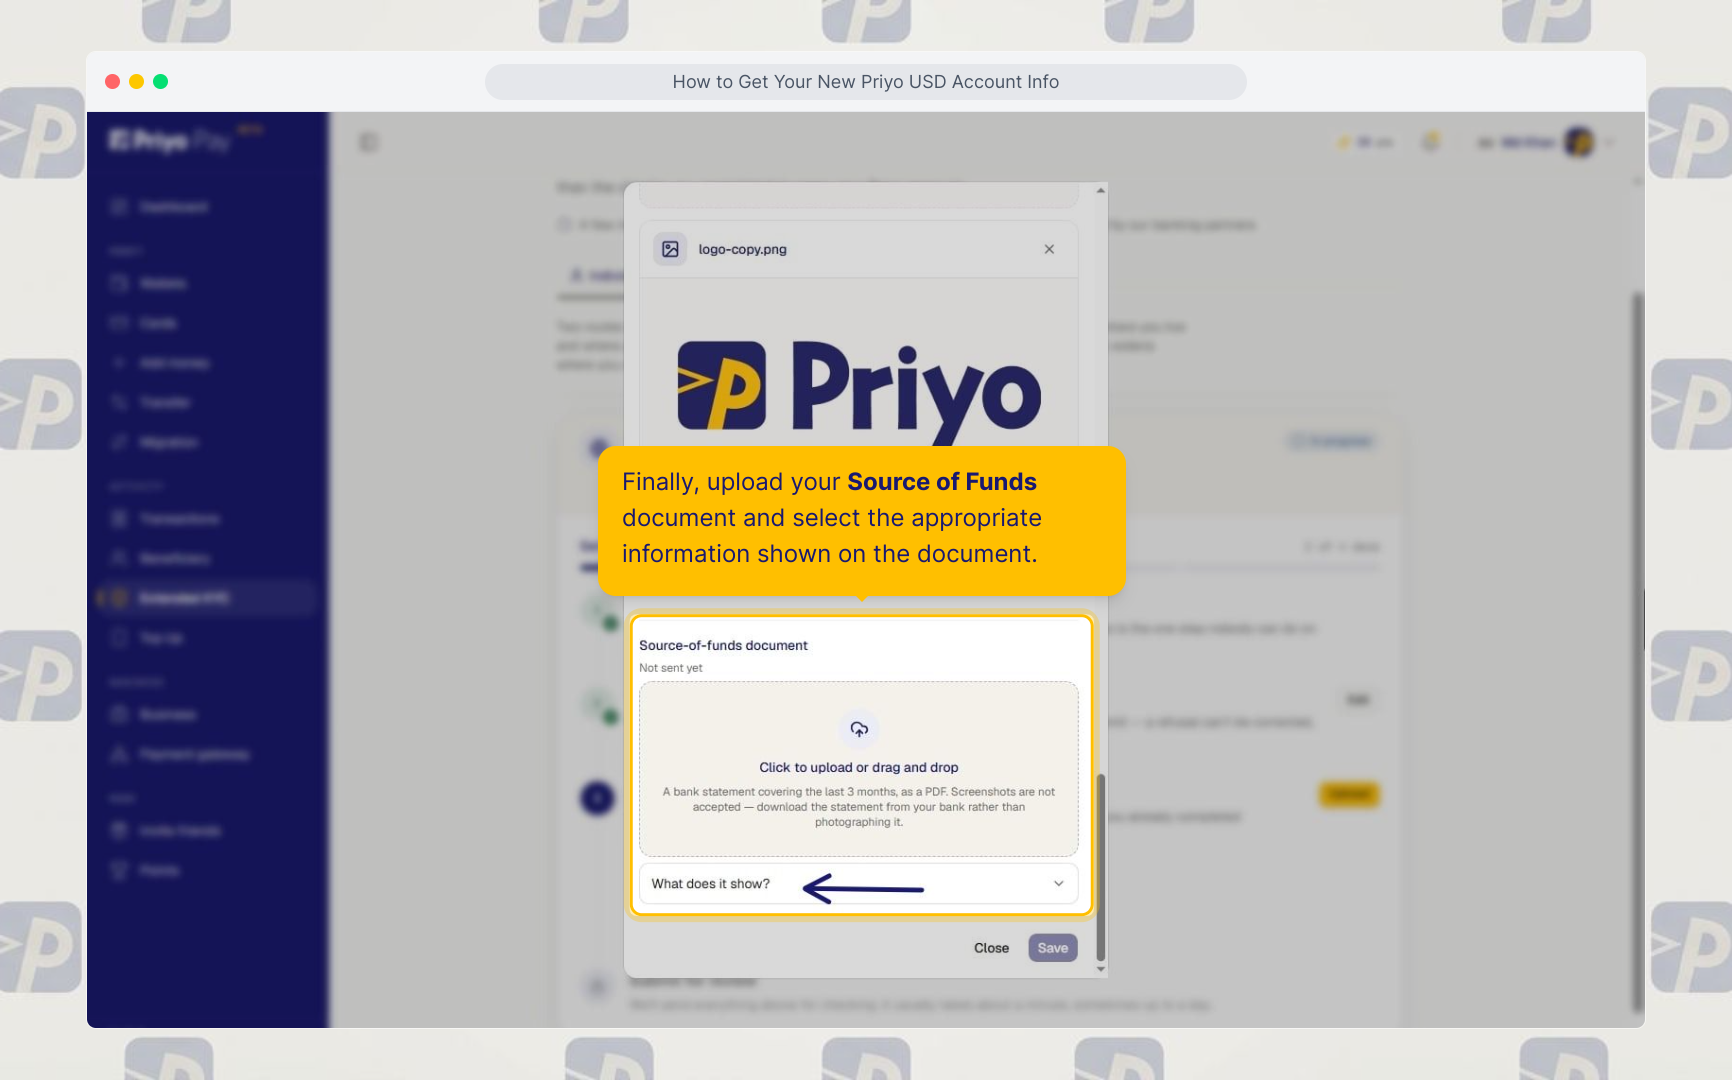
14. Upload Source of Funds
Upload your Source of Funds document and select the appropriate information shown on the document.
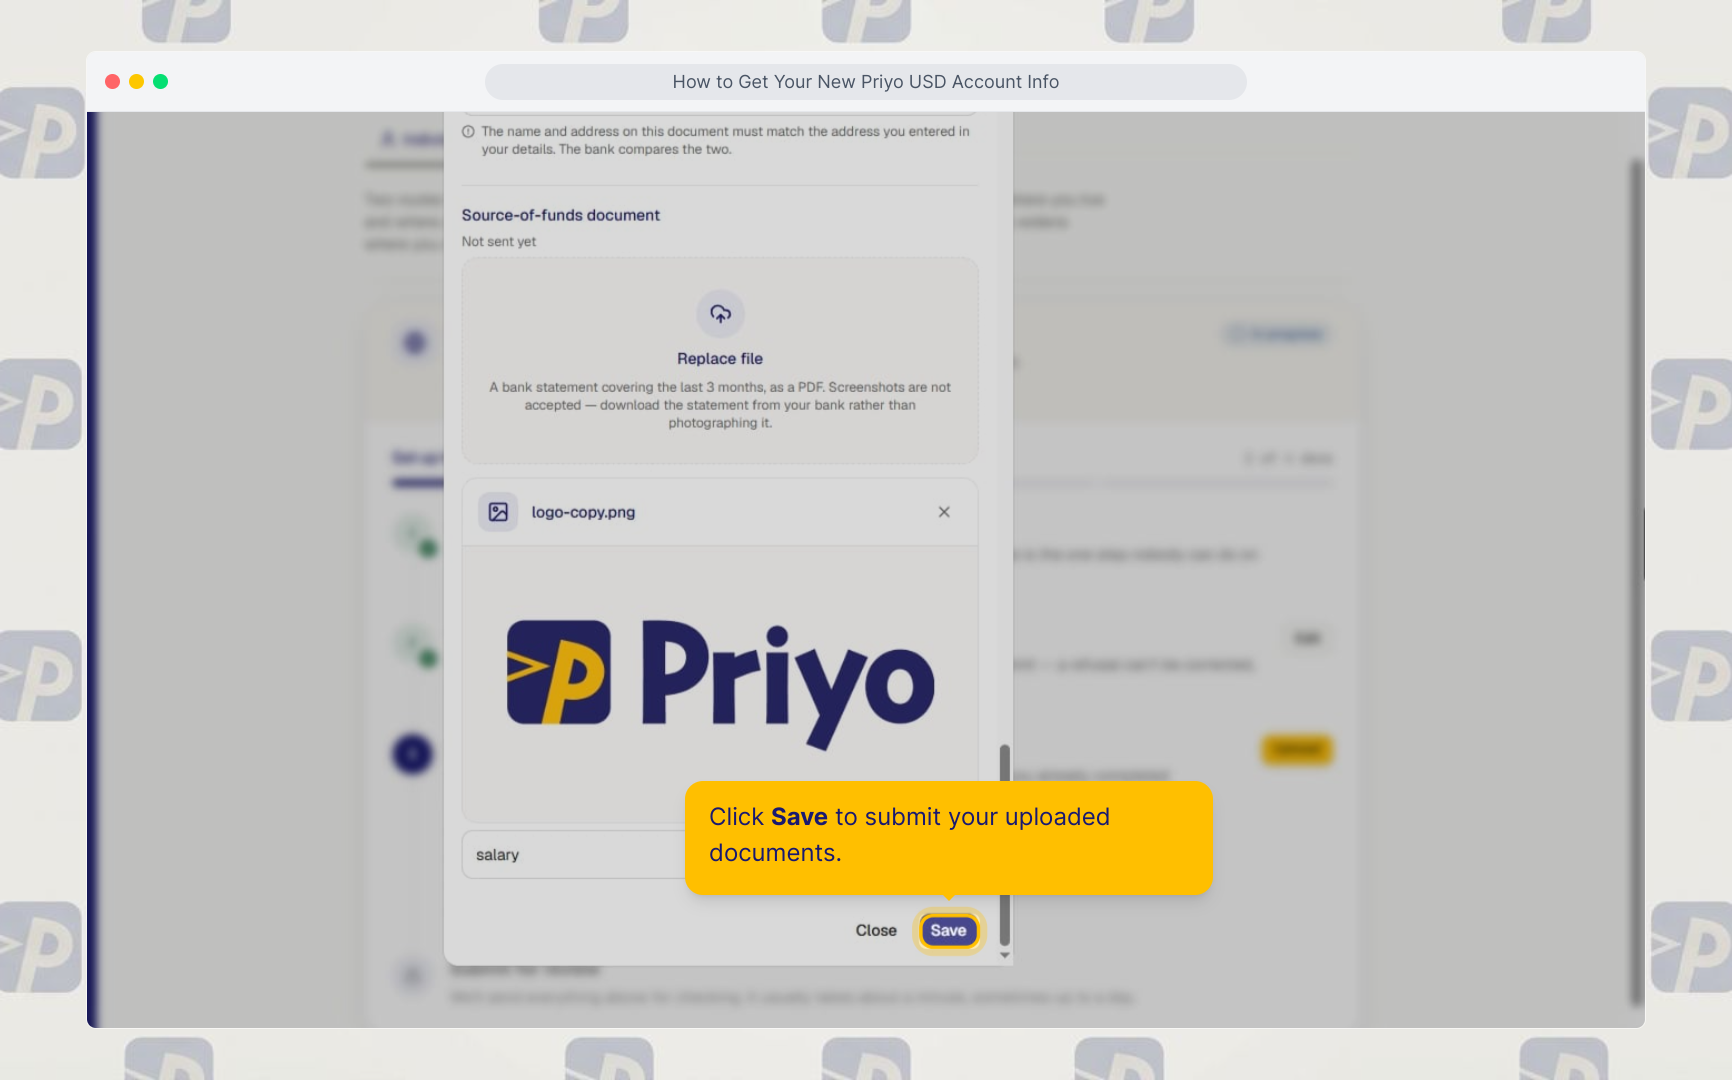
15. Save Your Documents
Click Save to submit your uploaded documents.
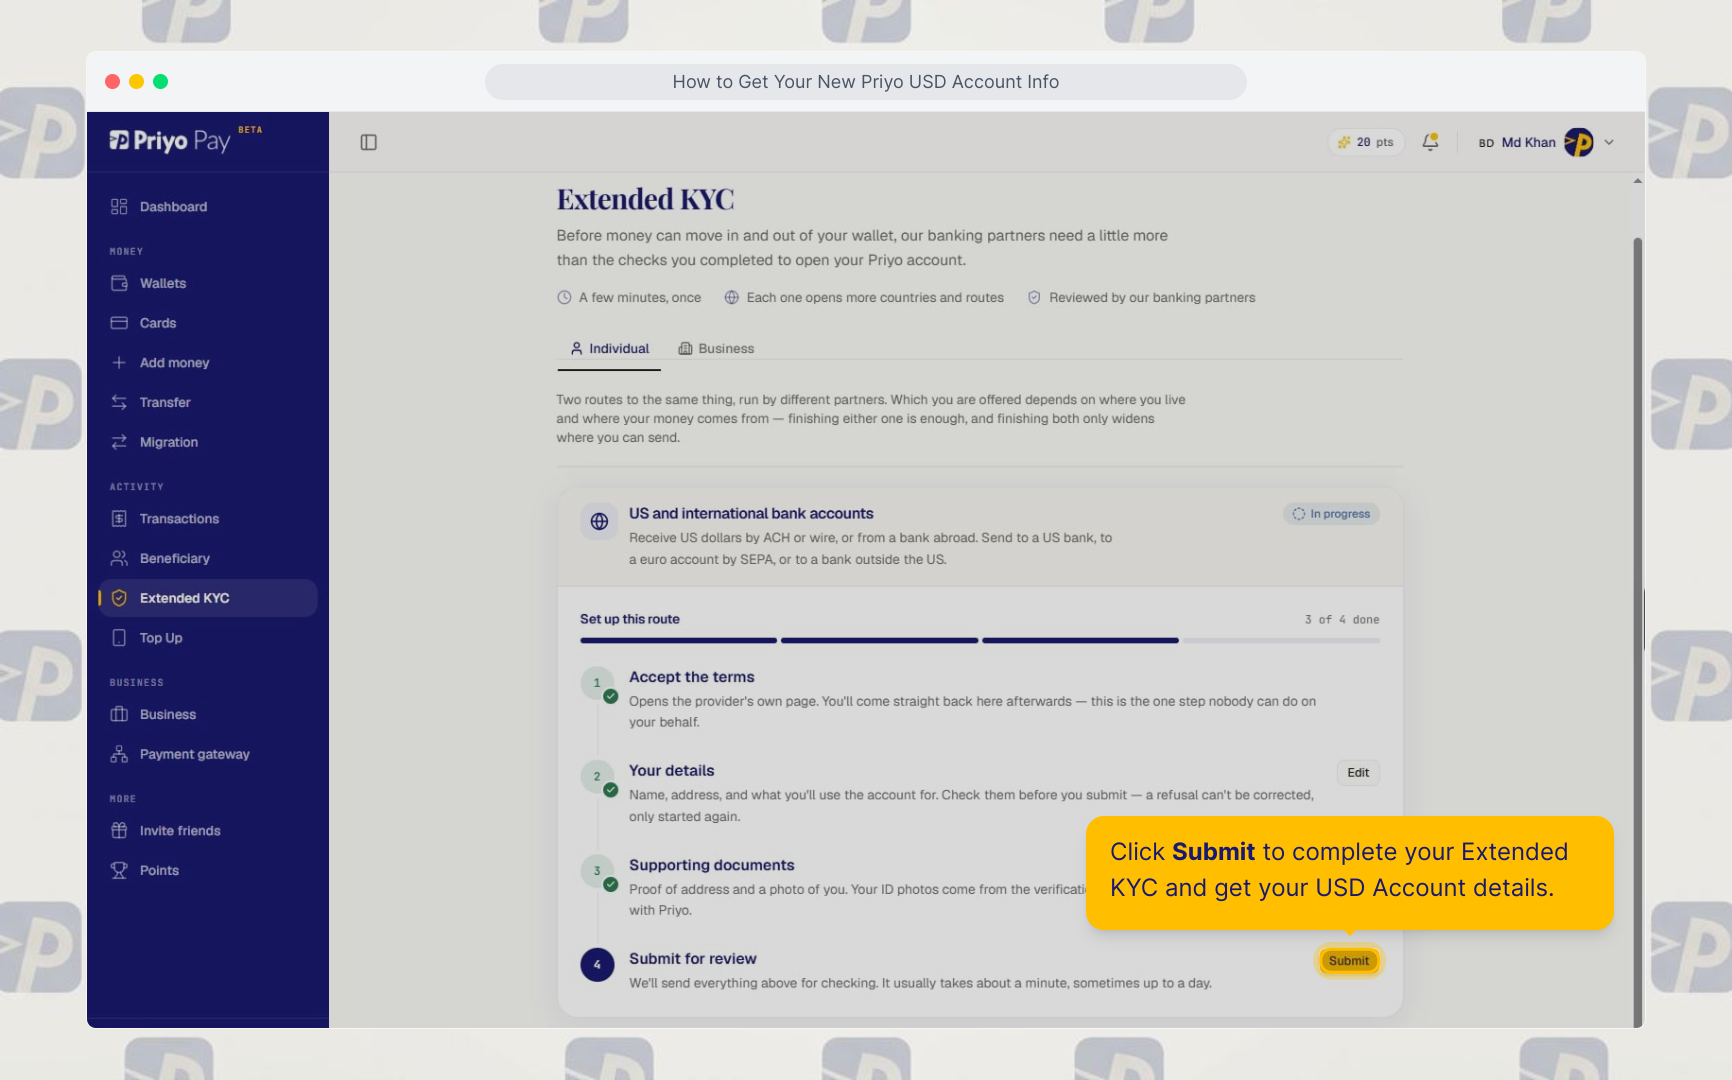
16. Submit Extended KYC
Click Submit to complete your Extended KYC application.
17. Wait for Approval
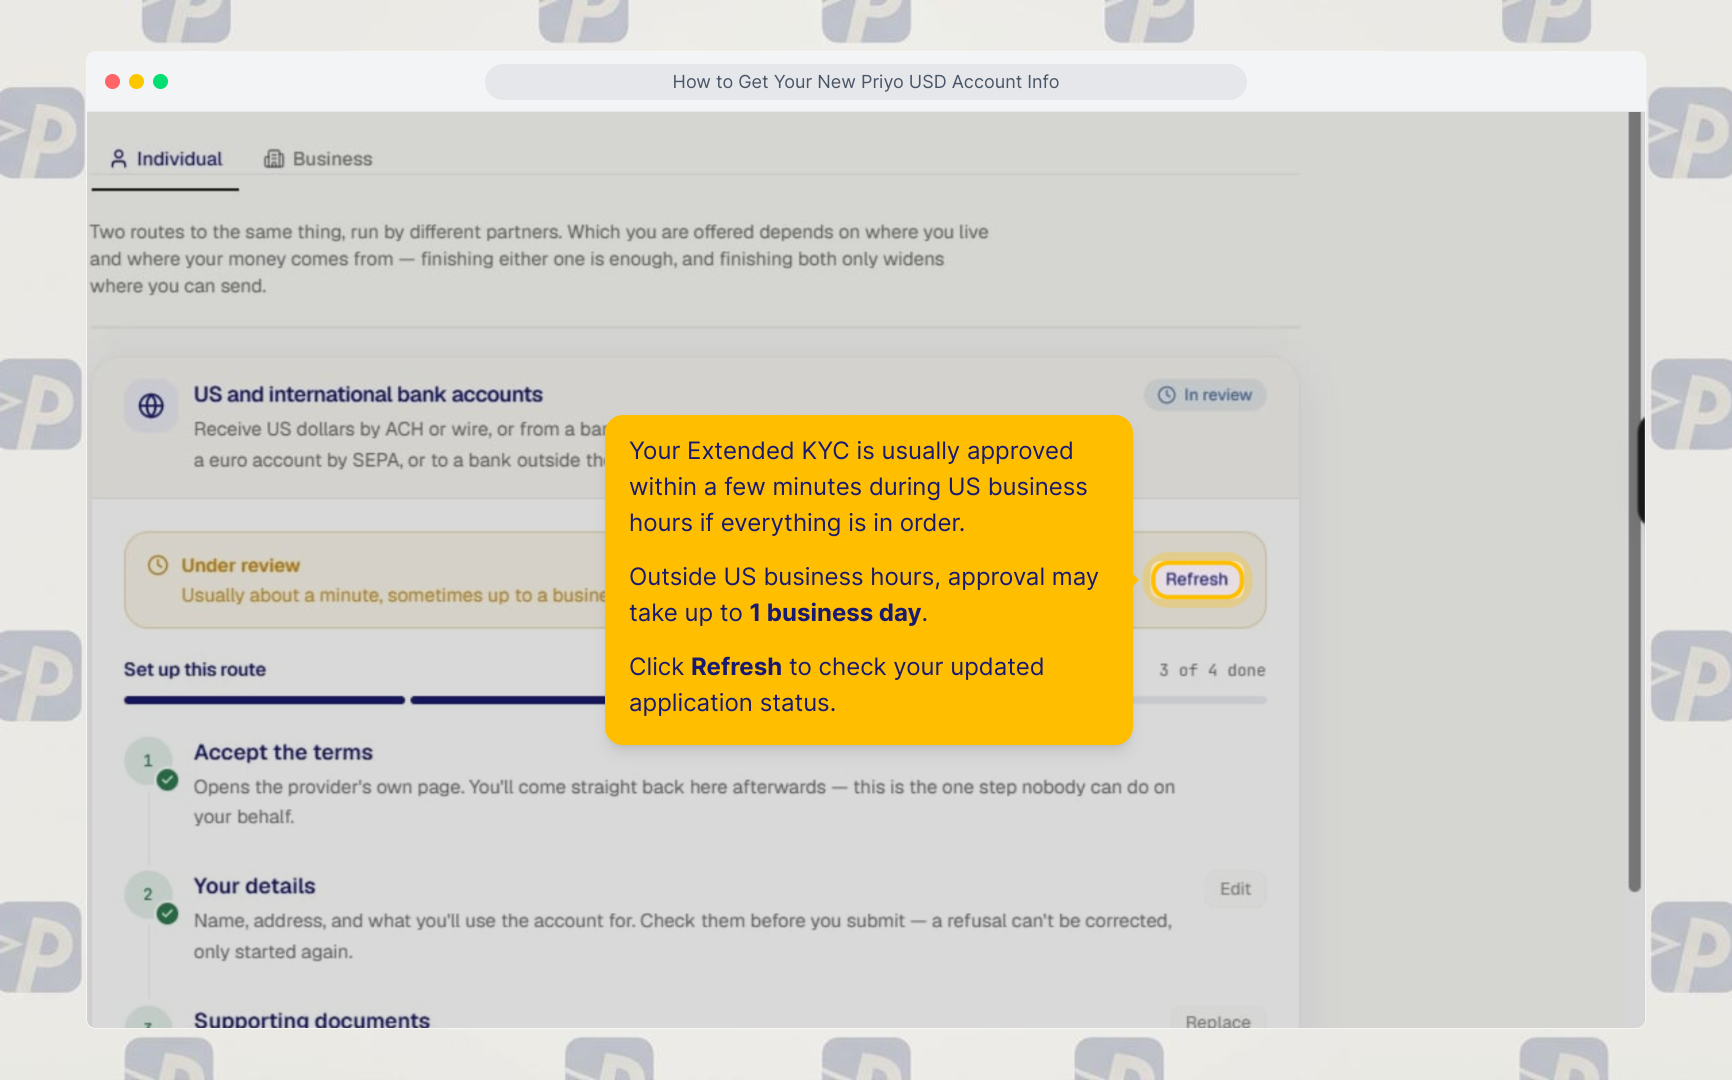
Your Extended KYC is usually approved within a few minutes during US business hours, provided everything is in order.
Outside US business hours, approval may take up to 1 business day.
Click Refresh to check your updated application status.
18. Access Your USD Account
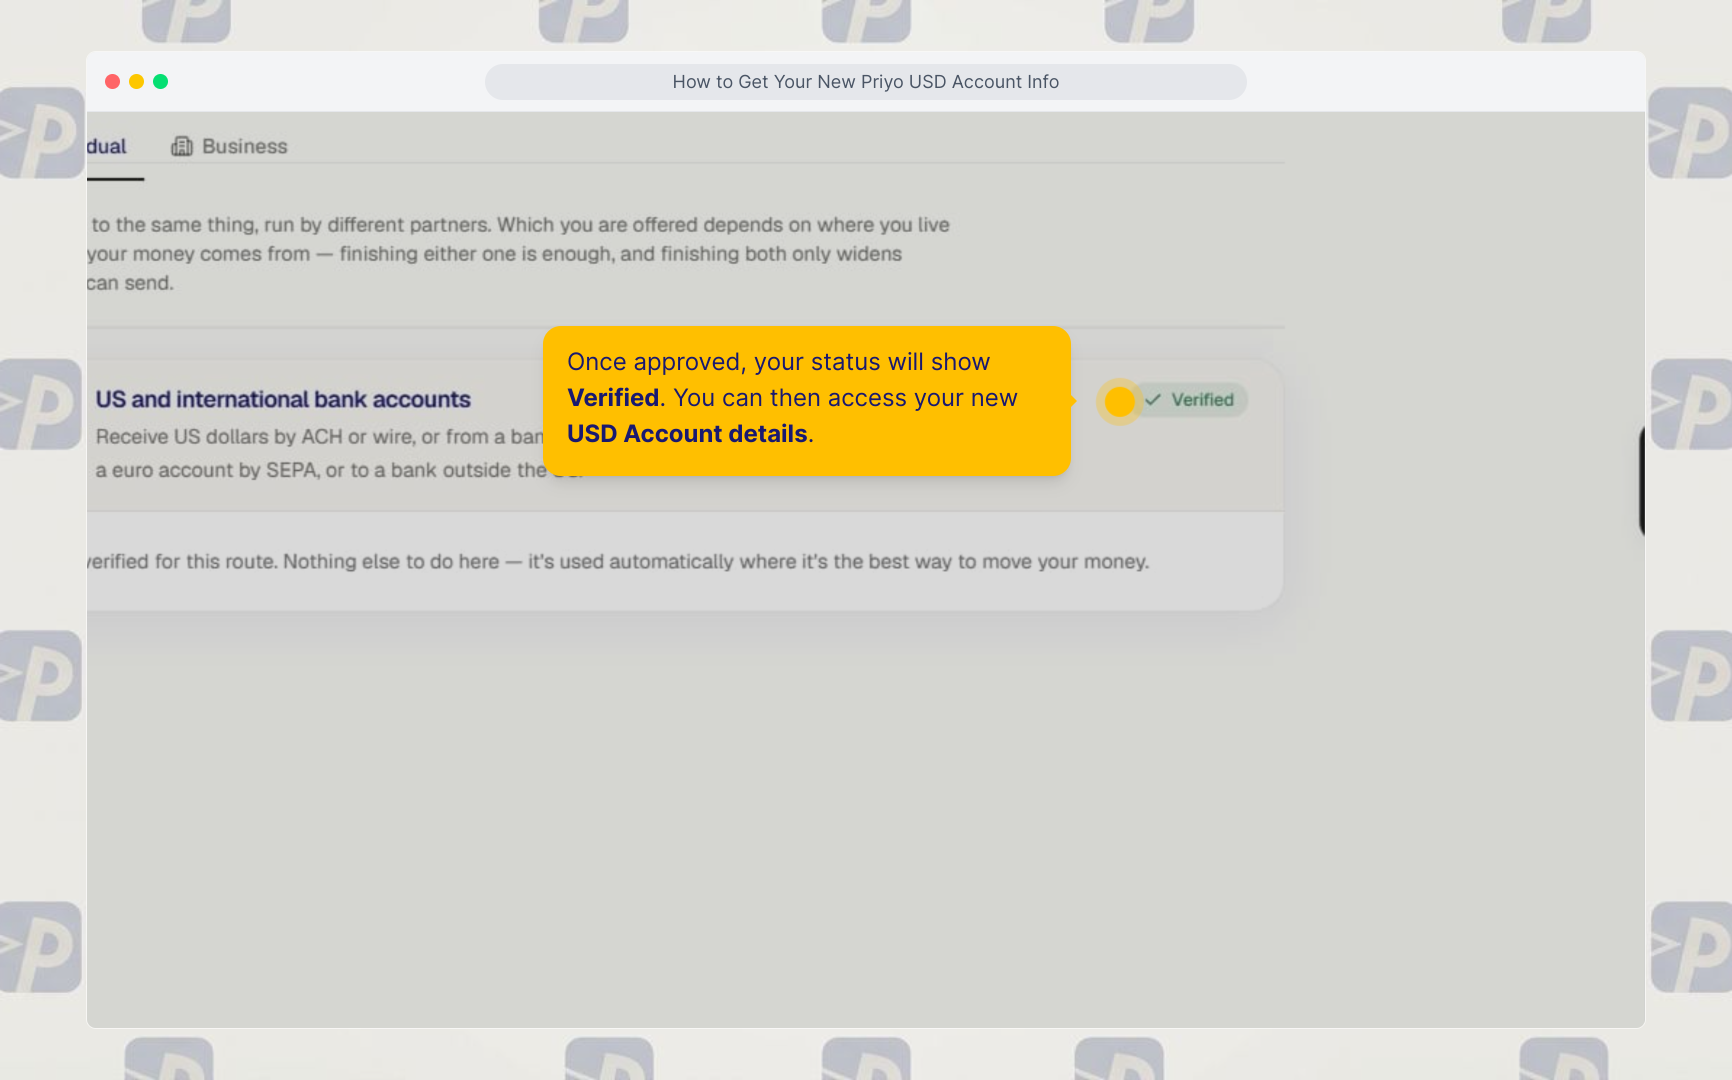
Once approved, your status will show Verified.
You can then access your new USD Account details.
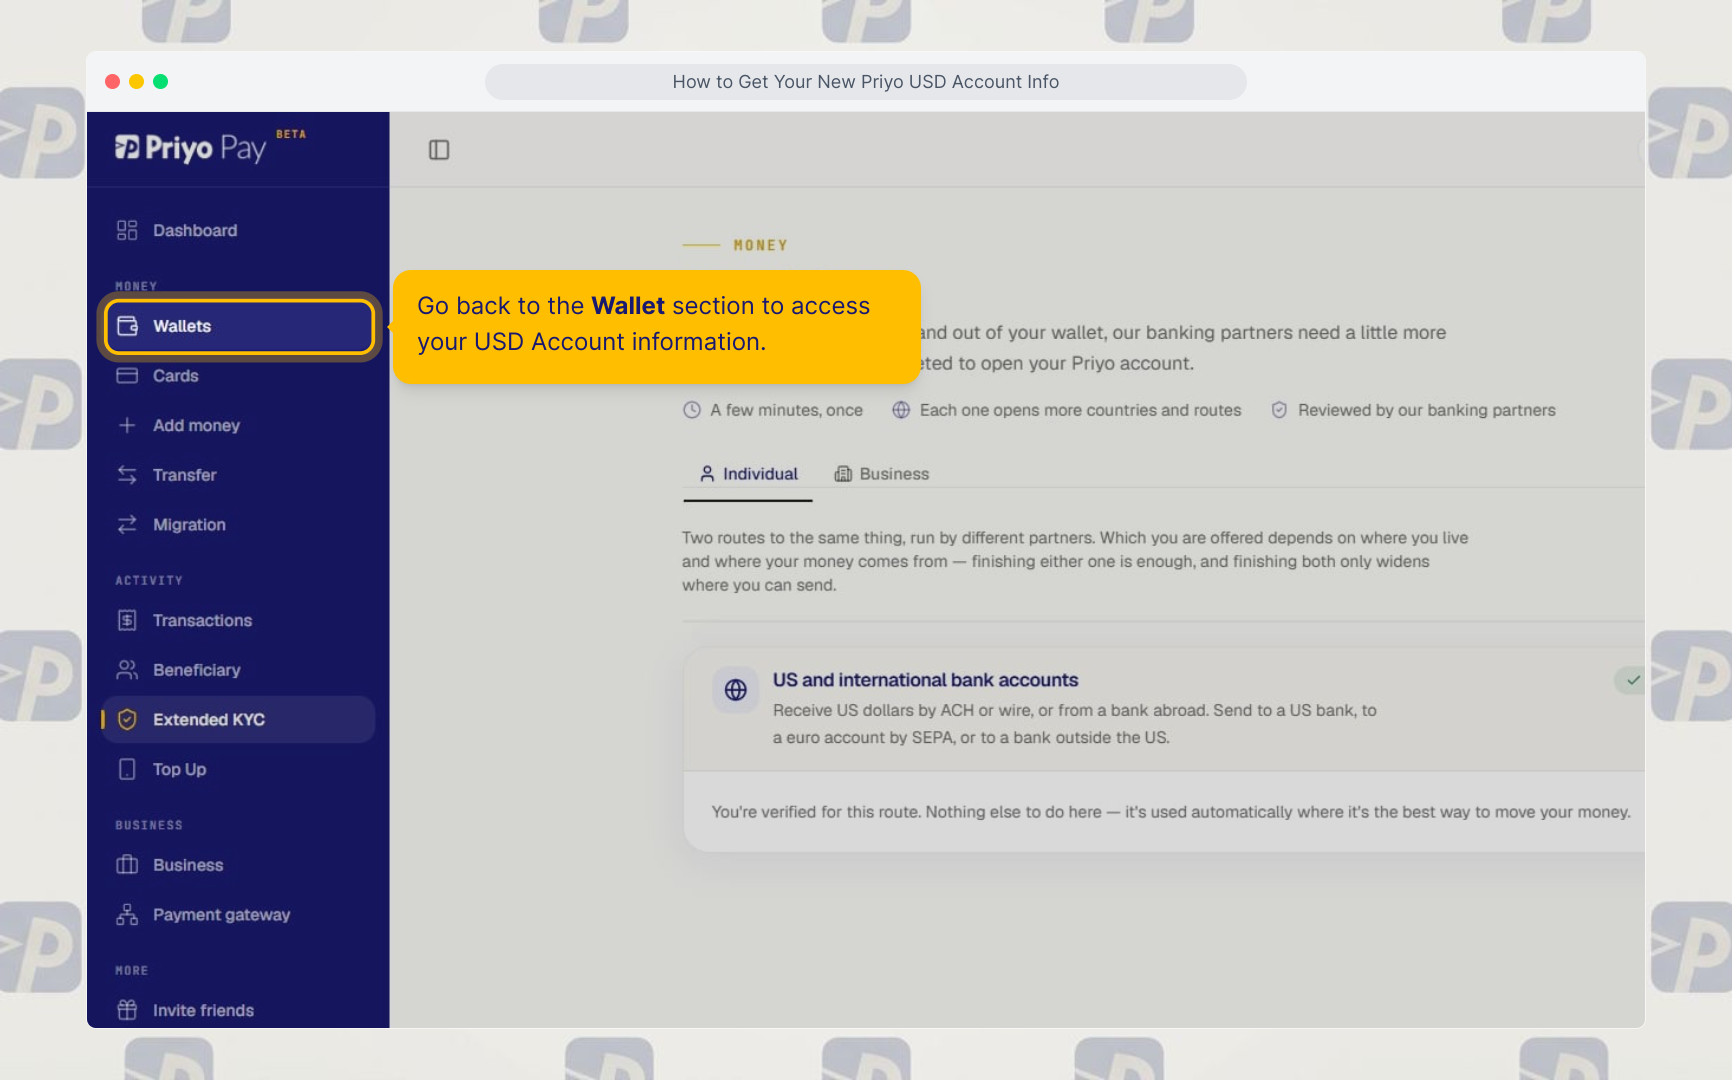
19. Go to Your Wallet
Go back to the Wallet section to access your USD Account information.
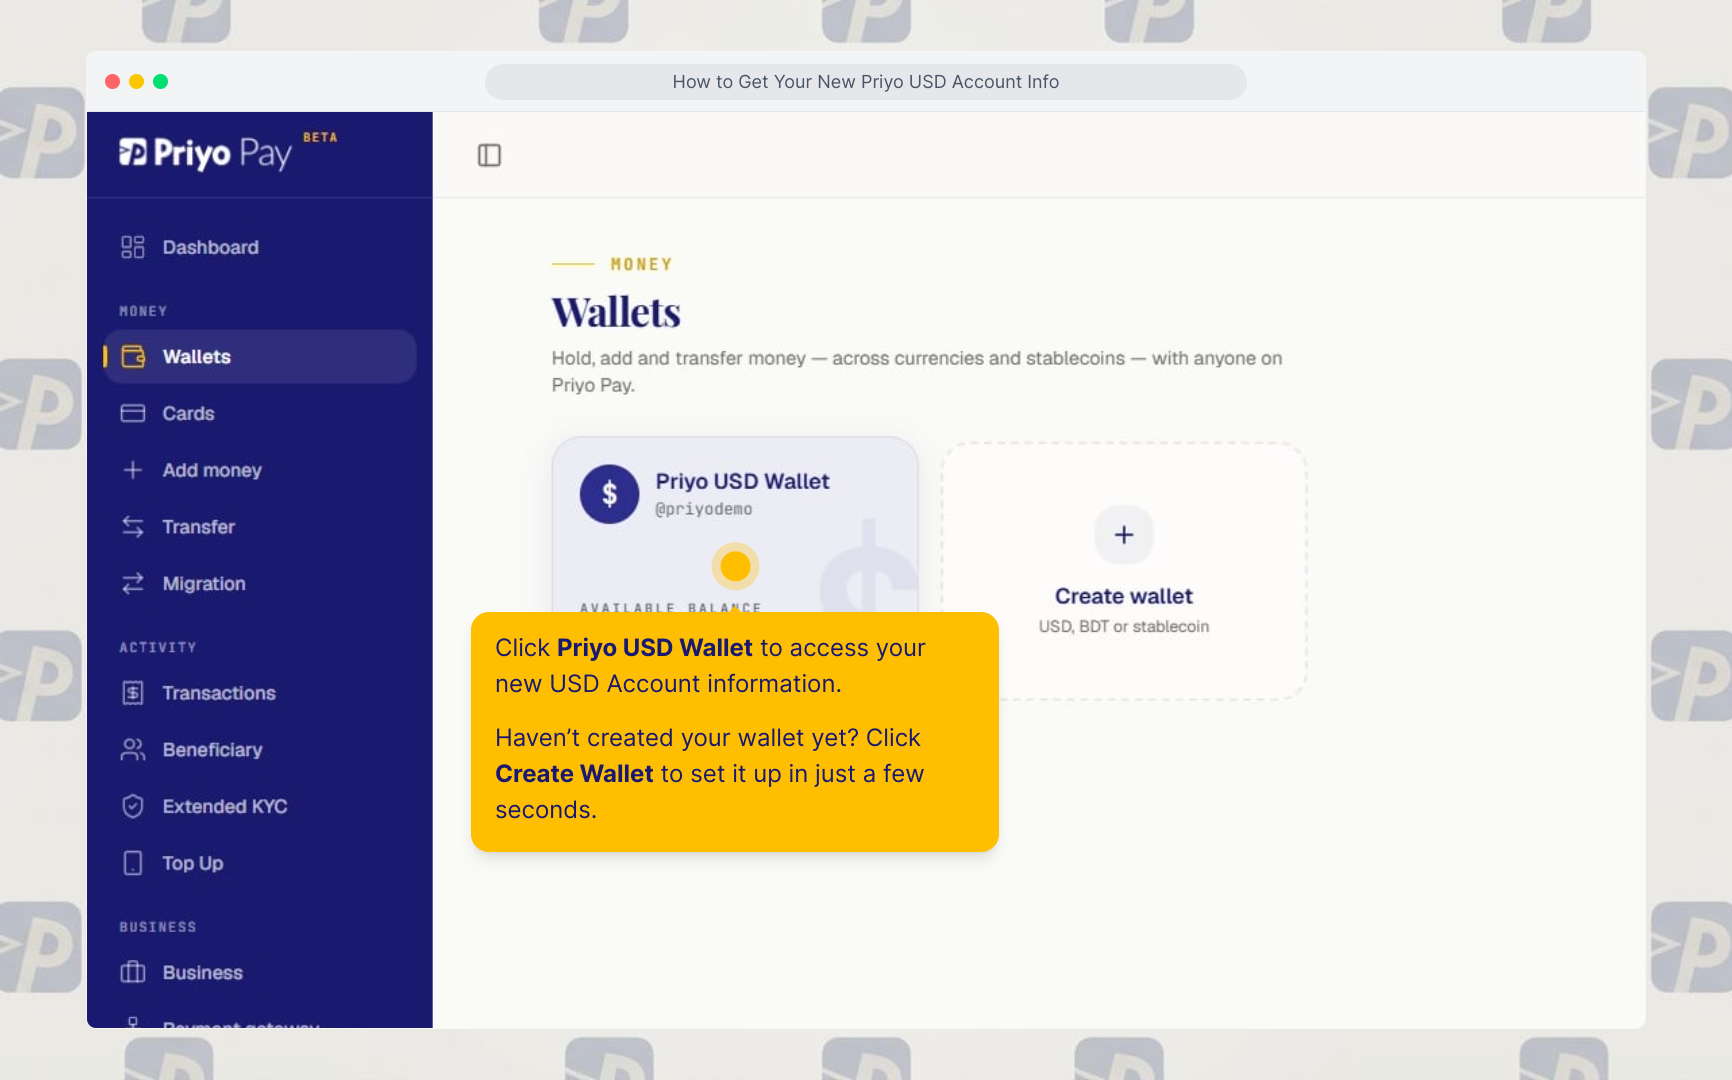
20. Open Priyo USD Wallet
Click Priyo USD Wallet to access your new USD Account information.
If you haven’t created your wallet yet, click Create Wallet to set it up.
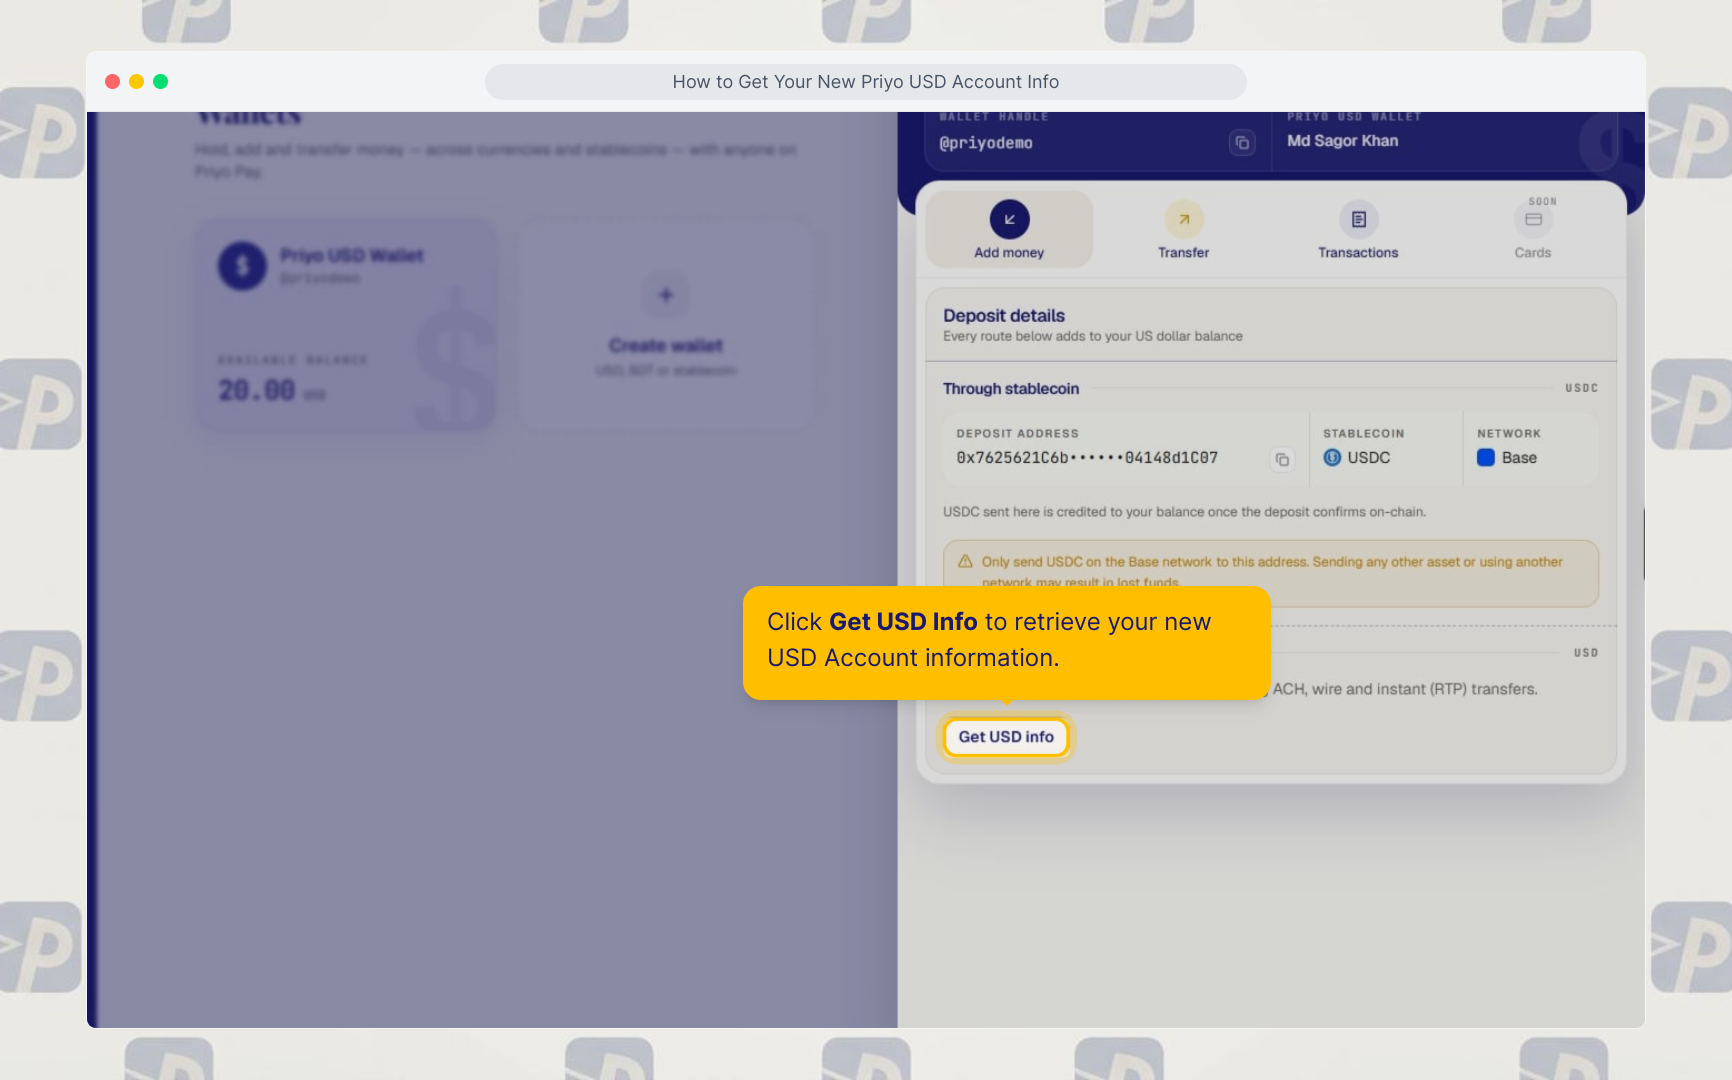
21. Get Your USD Account Information
Click Get USD Info to retrieve your new USD Account information.
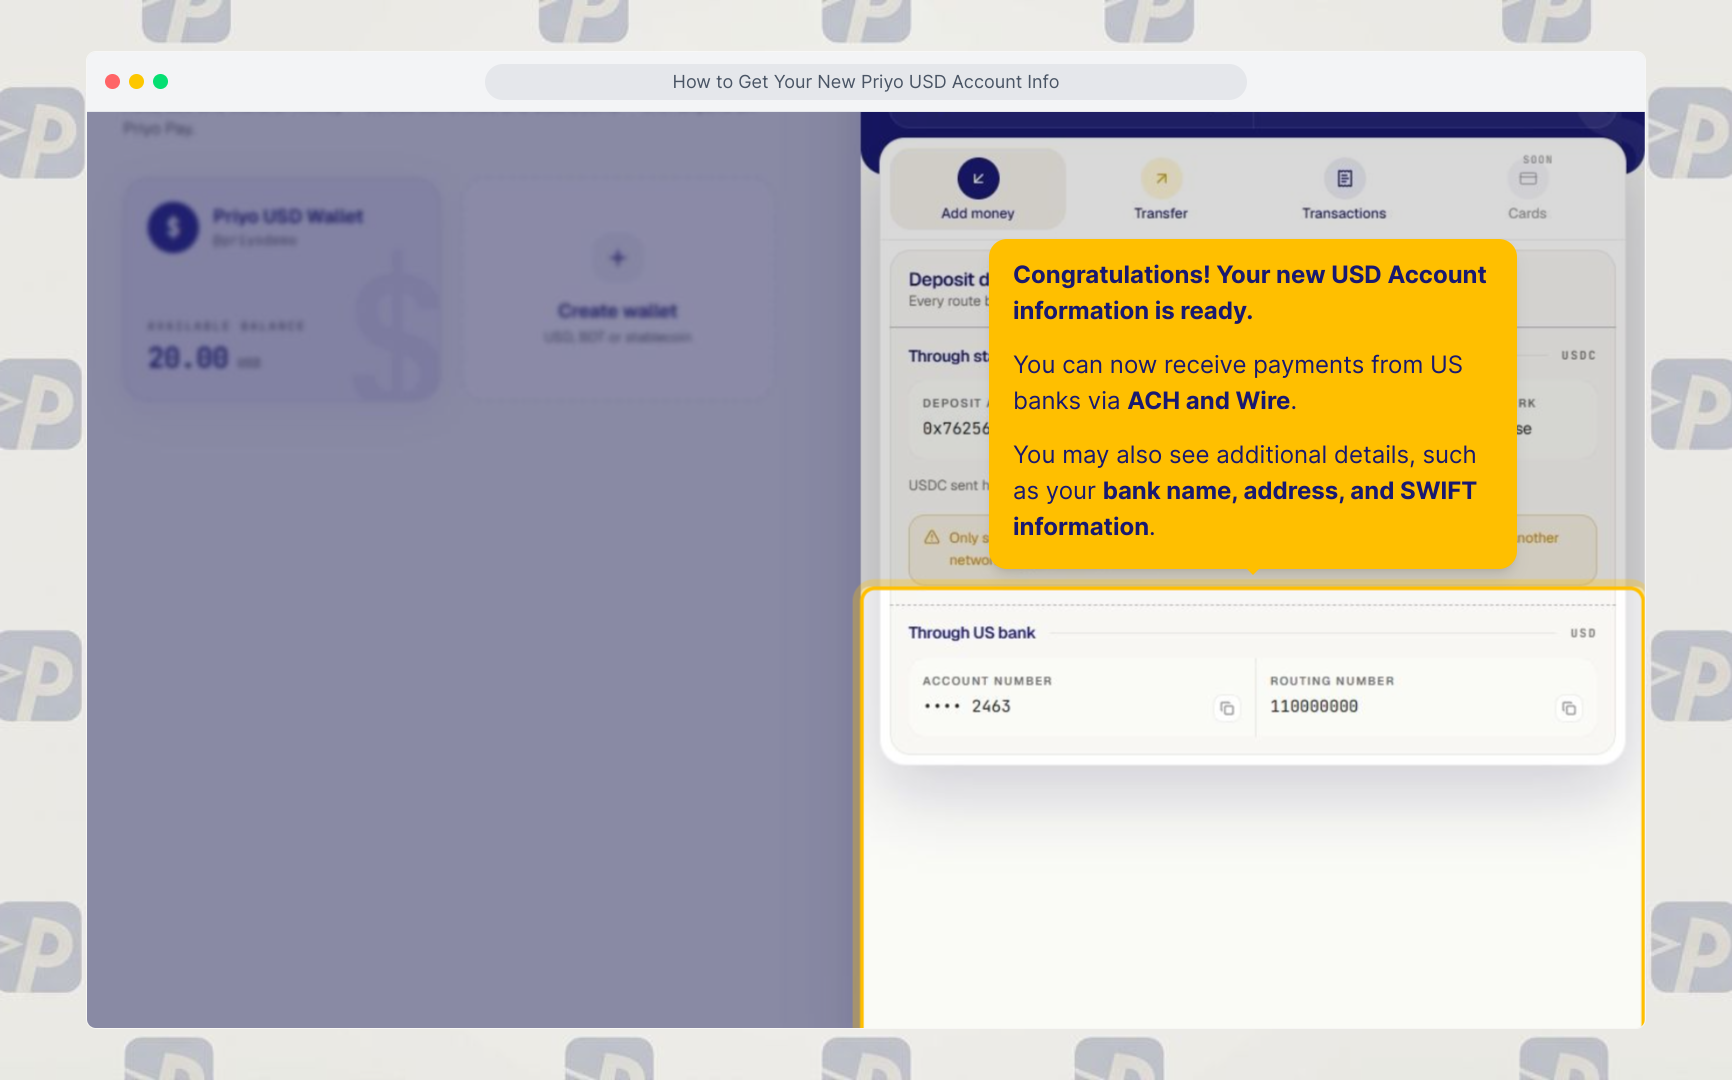
22. Your USD Account Information Is Ready
Congratulations! Your new USD Account information is ready.
You can now receive payments from US banks via ACH and Wire.
You may also see additional details such as:
- Bank name
- Bank address
- SWIFT information
23. Conclusion
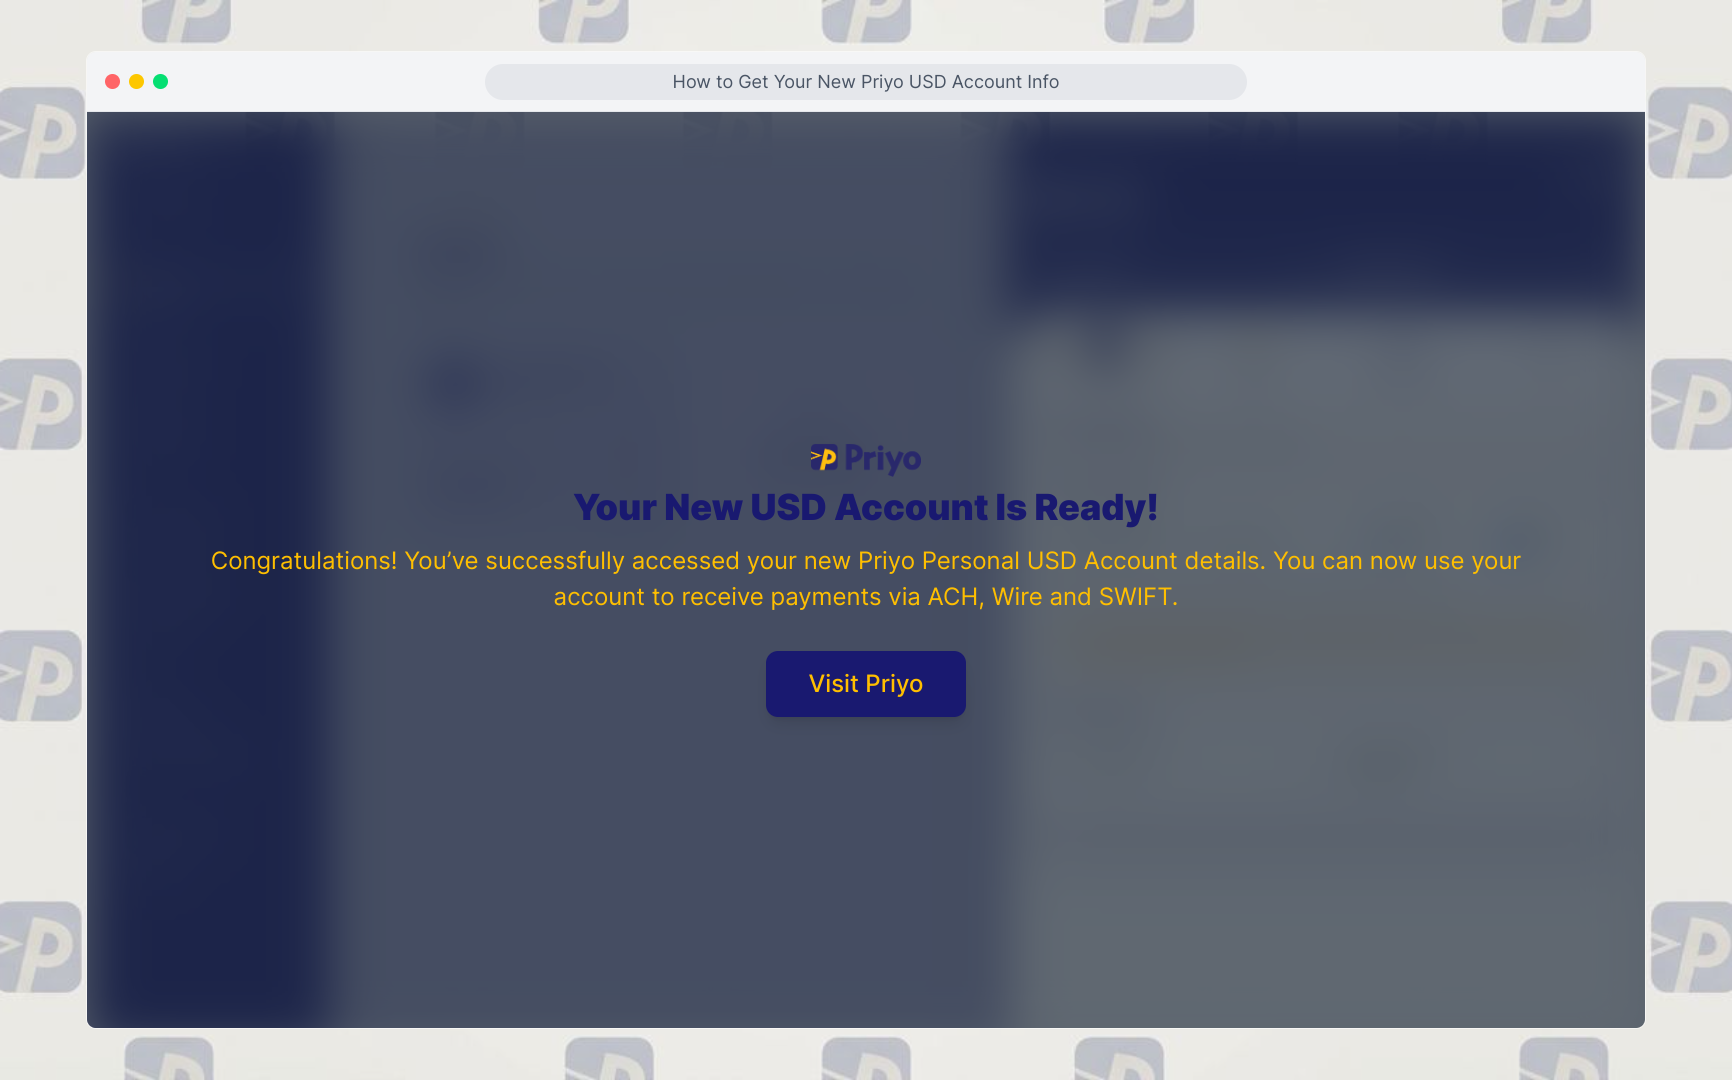
You’re all set! You can now use your new USD Account information to receive eligible payments.
Updated on: 21/09/2026
Thank you!